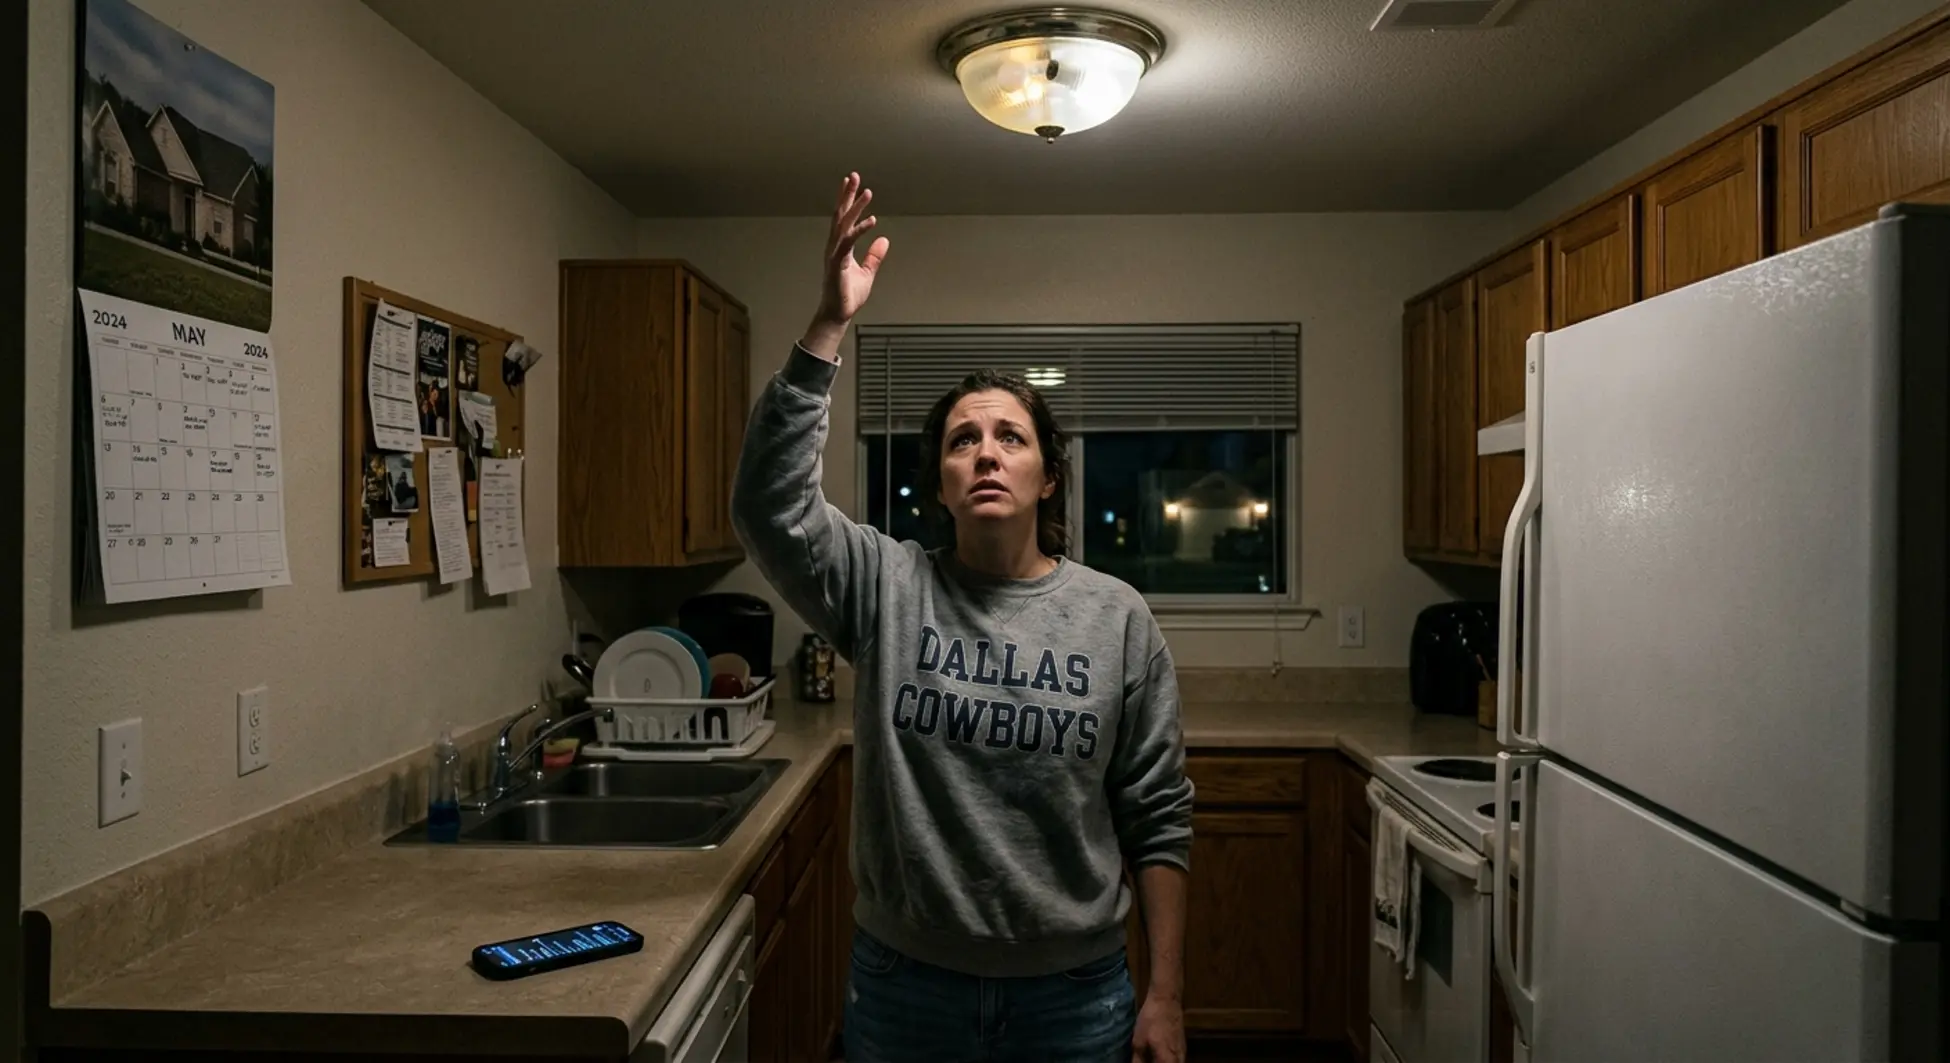
Can I Install an Induction Cooktop on My Existing Circuit? DFW Electrician Explains When You Need New Wiring
⚡ Key Takeaways
- Sometimes Yes, Sometimes No – Portable 120V induction cooktops can use existing outlets, but built-in units typically need dedicated 240V circuits
- Wire Gauge Matters – 30-inch units often need 40A circuits (8 AWG), 36-inch units need 50A circuits (6 AWG copper)
- Your Home’s Age Is Critical – DFW homes built 1965-1972 often have aluminum wiring that’s dangerous for high-power cooktops
- Not All Electric Circuits Are Equal – Just because you had an electric cooktop doesn’t mean your wiring can handle a new induction unit
- Panel Capacity Check First – Many 100A panels in older DFW homes can’t support a 50A induction cooktop without upgrades ($2,500-$4,500)
- Manufacturer Trumps NEC – Even if code allows sharing circuits, your warranty requires a dedicated line
- 3-Wire vs 4-Wire – Pre-1996 outlets lack proper grounding; modern induction cooktops need 4-wire connections
- Fort Worth Permits Required – Unpermitted work voids insurance and creates resale nightmares
- Total Cost Reality – Budget $800-$2,500 for electrical work, not just the appliance cost
You’ve done the research. You know induction cooktops are faster, safer, and more energy-efficient than gas or traditional electric. You’ve picked out the perfect 36-inch Bosch or Samsung model. Then the installer arrives and drops the bad news: “Your electrical system can’t handle this. You’ll need a panel upgrade. That’s another $3,500.”
This scenario plays out daily in Fort Worth, Arlington, and across the DFW metroplex. You’re not being upsold. The problem is real—and it’s rooted in how homes were wired decades ago versus what modern induction technology demands.
Here’s what homeowners tell us when they call Epic Electrical:
“My contractor said I need a complete panel upgrade just to install an induction cooktop. Is that really necessary, or am I being taken advantage of?”
“I already have an electric cooktop. Can’t I just swap it for induction and use the same wiring?”
“My home inspector flagged the electrical as ‘aluminum wiring.’ What does that mean for my kitchen upgrade?”
If you’re asking these questions, you’re in the right place. This guide breaks down exactly when your existing circuit works, when it doesn’t, and what you’ll actually pay in the Fort Worth area to get it done right.
💡 The Epic Electrical Difference
At Epic Electrical, we don’t believe every kitchen upgrade needs a $4,000 panel replacement. But we also won’t cut corners that put your family at risk or void your appliance warranty. We’ll tell you exactly what your home needs—no more, no less. That’s our promise to every Fort Worth homeowner we serve.
When Your Existing Circuit Actually Works
Let’s start with the good news: in some cases, your existing electrical circuit can handle a new induction cooktop. These situations are less common than most homeowners hope, but they do exist.
The Portable Induction Cooktop Exception
Portable or countertop induction cooktops (the kind you can move around) typically run on standard 120-volt power. If you’re buying a single-burner or two-burner portable unit for occasional use, you can plug it into any standard kitchen outlet. No special wiring required.
These units are perfect for:
- Apartments where you can’t modify electrical systems
- Supplemental cooking capacity during holidays
- Testing induction technology before committing to a full installation
However, portable units have significant limitations. They typically max out at 1,800 watts per burner (compared to 3,700+ watts for built-in induction elements). If you’re planning a serious kitchen upgrade, you’re looking at a built-in unit—which brings us to the real question.
The Rare “Easy Swap” Scenario
✅ When You Can Use Your Existing Circuit
Your existing electric cooktop circuit will work for a new induction cooktop ONLY if all four of these conditions are met:
- Built After 1996 – Circuit uses modern 4-wire grounded configuration (two hots, one neutral, one ground)
- Copper Wiring – No aluminum branch circuit wiring (critical safety issue we’ll cover below)
- Properly Sized Amperage – Wire gauge matches or exceeds new cooktop’s requirements (typically 40A minimum for 30-inch, 50A for 36-inch)
- Dedicated Circuit – Not shared with wall oven or any other appliance
If your home meets all four criteria, you’re in the lucky 15%. Your electrician can simply disconnect the old cooktop and connect the new induction unit to the existing junction box. Total installation cost: $250-$450 for labor.
Easy Swap Qualification Rate
Only about 15% of DFW retrofit projects qualify for simple swap installations without circuit modifications or upgrades.
In our Fort Worth service area, we see “easy swap” scenarios mainly in newer homes built 2000-2015 in Keller, Southlake, and Colleyville neighborhoods. These communities were developed when modern electrical standards were already in place, and builders typically installed robust 50-amp circuits for ranges during initial construction.
For everyone else—and that’s the vast majority of DFW homeowners—the answer gets more complicated. The good news? Understanding why it’s complicated helps you avoid expensive mistakes and dangerous shortcuts.
Why Induction Cooktops Often Need Different Wiring Than Electric
Here’s where the confusion starts. Many homeowners assume: “I have an electric cooktop now, so obviously my wiring can handle another electric appliance.” That logic seems solid, but it breaks down when you look at the actual power demands.
The Voltage and Amperage Differences
Both traditional electric resistance cooktops and modern induction cooktops operate on 240-volt dedicated circuits. So far, so good. But the similarity ends there.
Traditional electric cooktops use resistive heating elements—the coils that glow red when heated. These present a steady, predictable electrical load. A typical 30-inch electric cooktop from the 1990s or early 2000s might draw 30-35 amps at peak usage.
Induction cooktops use electromagnetic coils driven by high-frequency inverters. While the steady-state load might be similar, induction units feature “Boost” or “Power” modes that temporarily push amperage draw to the unit’s absolute maximum. A modern 36-inch induction cooktop can pull 45-50 amps when all burners are maxed out simultaneously.
| Cooktop Type | Voltage | Typical Amperage | Wire Gauge Required | Circuit Type |
|---|---|---|---|---|
| Electric 30″ | 240V | 30-40A | 8-10 AWG | Dedicated 240V |
| Induction 30″ | 240V | 40A | 8 AWG | Dedicated 240V |
| Electric 36″ | 240V | 40-50A | 6-8 AWG | Dedicated 240V |
| Induction 36″ | 240V | 50A | 6 AWG | Dedicated 240V |
💡 The “Boost Mode” Factor
Induction cooktops advertise their “Power Boost” feature as a selling point—boil water in 90 seconds, rapid searing, etc. What they don’t advertise is that this feature requires your electrical circuit to deliver maximum rated amperage on demand. An old 40-amp circuit sized for a gentle electric coil cooktop will trip the breaker the first time you activate boost mode on two burners simultaneously on your new Samsung 36-inch induction unit.
Real-World Example: Samsung 36-Inch Induction
Samsung’s popular 36-inch induction cooktops have a total connected load exceeding 10,000 watts (10 kW). At 240 volts, this translates to approximately 42 amps under normal operation, but can spike to 45+ amps when using multiple boost functions.
If your existing electric cooktop circuit is wired with 8 AWG copper wire on a 40-amp breaker (which was standard for older 36-inch electric ranges), that circuit is technically undersized for the Samsung unit. The manufacturer specification calls for a 50-amp circuit with 6 AWG copper wire.
Can you install it anyway and “get away with it”? Maybe—until you use the cooktop the way it’s designed to be used. Then you’ll experience nuisance breaker trips, reduced performance, and potential warranty issues.
The 2023 NEC GFCI Requirement
Adding to the complexity, Texas adopted the 2023 National Electrical Code (NEC) effective September 1, 2023. Fort Worth, Dallas, and Arlington all operate under this updated code cycle.
One critical change: NEC 210.8(D) now mandates GFCI (Ground-Fault Circuit Interrupter) protection for the branch circuit supplying cooktops. This applies even if the cooktop is hardwired directly to a junction box (not plugged into an outlet).
What this means for you:
- Standard 50A two-pole breaker: $15-$25
- GFCI 50A two-pole breaker: $110-$160
- Direct material cost increase of approximately $140 per installation
But here’s the catch: early generations of induction cooktops sometimes caused “nuisance tripping” of GFCI breakers due to the high-frequency leakage currents inherent in electromagnetic induction. Both appliance manufacturers and breaker manufacturers have improved compatibility, but this remains a potential issue.
⚠️ GFCI Compatibility Note
If you’re installing an induction cooktop in 2025, make sure your electrician uses current-generation GFCI breakers specifically rated for the high-frequency loads of induction appliances. Using old stock from 2020-2021 can lead to frustrating false trips that shut down your cooktop mid-cooking.
For Fort Worth homeowners working with licensed electricians like Epic Electrical, this code compliance happens automatically. For those considering DIY or unlicensed work, it’s one more reason why shortcuts end up costing more in the long run.
Why DFW Homes Built 1965-1972 Face Dangerous Circuit Risks
If your home was built in the late 1960s or early 1970s, stop reading this article right now and go check your electrical panel. Seriously.
Between 1965 and 1972, the price of copper skyrocketed due to global supply constraints. Builders across the United States—including the rapidly expanding Dallas-Fort Worth suburbs—switched to single-strand aluminum branch circuit wiring as a cost-saving measure.
This affected thousands of homes in Richardson, Plano, North Dallas, Arlington, and older sections of Fort Worth. If you live in a neighborhood developed during this era, there’s a high probability your home contains aluminum wiring.
The Aluminum Wiring Timeline in DFW
The boom years for aluminum wiring installation coincided with massive suburban expansion in North Texas:
- 1965-1967: Copper prices begin dramatic rise
- 1968-1972: Peak aluminum wiring usage in residential construction
- 1972-1974: Problems begin emerging (connection failures, fires)
- 1974: Copper prices stabilize; builders largely abandon aluminum
If you’re buying a home built during this window, or if you’ve owned one for years and never thought about the wiring, now is the time to investigate.
Why Aluminum + Induction = Fire Hazard
Aluminum possesses fundamentally different thermal and mechanical properties than copper. When you connect a high-amperage appliance like an induction cooktop to an aluminum circuit, physics works against you:
The Mechanism of Failure
- Thermal Expansion: Aluminum expands and contracts significantly more than copper when heated (a frequent occurrence in 40-50 amp cooktop circuits)
- Cold Flow: This repeated thermal cycling causes the aluminum wire to “creep” or permanently deform under the screw terminal, creating a progressively looser connection
- Oxidation: Exposed aluminum instantly forms a non-conductive aluminum oxide layer. As the connection loosens, oxidation accelerates
- Increased Resistance: The oxide layer and loose connection increase electrical resistance
- Runaway Thermal Event: Increased resistance generates heat, which causes further expansion, more loosening, more oxidation—creating a runaway cycle that can melt wire insulation and ignite surrounding combustible materials
Aluminum Wiring Fire Risk
Homes with aluminum branch circuit wiring are 55 times more likely to have wire connections reach fire-hazard conditions compared to homes with copper wiring, according to the Consumer Product Safety Commission.
How to Identify Aluminum Wiring in Your DFW Home
You don’t need an electrician to make an initial determination. Here’s what to look for:
✅ Visual Identification Checklist:
- Check the Electrical Panel: Look for silver-colored conductors at the breaker terminals (copper is distinctly orange/brown)
- Read Cable Jacket Markings: Old cable jackets are often marked “AL,” “ALUMINUM,” or “KAISER ALUMINUM” in raised or printed letters
- Check Visible Wiring: In unfinished basements, attics, or garage areas, you may be able to see exposed cable runs
- Hire a Home Inspector: If you’re unsure, a certified home inspector can definitively identify wiring composition
In Arlington neighborhoods developed in the late 1960s—particularly areas south of I-20 and east of Cooper Street—we frequently encounter aluminum wiring during kitchen remodel inspections. The same is true for Richardson homes in the Arapaho/Coit area from this era.
The ONLY Safe Solutions for Aluminum Wiring
If you’ve confirmed you have aluminum branch circuit wiring and you want to install a high-power induction cooktop, you have exactly three options. Only one of them is truly safe for long-term use.
What NOT to Do
- Never use standard wire nuts to connect the copper leads from your new induction cooktop to aluminum house wiring. They will overheat and fail, often spectacularly.
- Don’t trust the “purple wire nut” shortcut. While Ideal 65 purple wire nuts are UL-listed for aluminum-to-copper connections, many electrical safety experts and insurance investigators consider them unreliable for sustained high-amperage loads like range circuits. The heat generation is simply too intense.
- Don’t ignore it and hope for the best. We’ve responded to kitchen fires where homeowners knew they had aluminum wiring and “took a chance.” The risk is real.
Option 1: Copalum Crimp Connections
This is a specialized cold-weld crimping system that permanently joins copper and aluminum conductors. It requires a proprietary tool that costs thousands of dollars, so very few electricians stock it. It’s expensive, time-consuming, and rarely available in the DFW area for residential service calls.
Realistic Cost if Available: $400-$800 for a single circuit retrofit
Option 2: AlumiConn Lugs
AlumiConn is a mechanical lug system that keeps copper and aluminum wires physically separated while creating an electrical connection. Each metal is coated with anti-oxidant compound. This is the most common “repair” method electricians use when they encounter aluminum wiring and don’t want to rewire.
The Problem: While AlumiConn lugs are vastly superior to wire nuts, they’re still a compromise solution. For a 50-amp induction cooktop circuit that will be cycled heavily (high heat loads multiple times daily), even AlumiConn represents elevated long-term risk.
Cost: $200-$400 for junction box retrofit with AlumiConn
Option 3: Complete Circuit Replacement (Recommended)
The only truly safe long-term solution is to abandon the old aluminum branch circuit entirely and pull new copper wire from the electrical panel to the kitchen.
This solves multiple problems simultaneously:
- Eliminates aluminum fire risk completely
- Upgrades to modern 4-wire grounded configuration (solving the 3-wire problem discussed below)
- Installs proper wire gauge for full 50-amp induction cooktop operation
- Ensures code compliance for inspection and future home resale
- Provides peace of mind for decades
Cost in Fort Worth: $1,000-$2,000 depending on wire run difficulty and access
✅ Epic Electrical’s Aluminum Wiring Policy
We won’t use AlumiConn lugs or purple wire nuts on high-amperage cooktop circuits. The heat cycling is too intense, and we won’t compromise on safety. If you have aluminum wiring and want induction, we’ll show you the cost to do it right—not the cheap shortcut that causes fires in five years. That’s how we keep Fort Worth families safe.
Yes, spending $1,500 on electrical upgrades before you even install your $2,500 induction cooktop is frustrating. But compare that to the cost of a house fire ($150,000+ in damages) or an insurance claim denial because the fire originated from unpermitted, substandard electrical work.
For homeowners in Arlington, Richardson, Plano, and older Fort Worth neighborhoods, this aluminum wiring issue is not hypothetical. It’s one of the most common serious problems we encounter during kitchen upgrade consultations.
Why Pre-1996 Outlets Can’t Safely Power Modern Induction Cooktops
Even if you don’t have aluminum wiring, homes built before 1996 face another critical compatibility issue: the 3-wire versus 4-wire grounding configuration.
The Code Change That Affects Your Kitchen
Prior to the 1996 National Electrical Code update, it was permissible—and indeed standard practice—to ground the metal frames of electric ranges and dryers to the neutral conductor. These circuits used what’s called a 3-wire configuration:
- Two “hot” conductors (the red and black wires, each carrying 120 volts)
- One combined neutral/ground conductor (the white wire)
This worked fine—until it didn’t. If the neutral wire broke anywhere between the panel and the appliance, the metal frame of the cooktop could become energized to 120 volts. Touch the cooktop with one hand and a grounded metal sink with the other hand, and you complete the circuit through your body. Lethal shock hazard.
📘 The Modern 4-Wire Standard (Post-1996)
Since the 1996 NEC, all new branch circuit installations must use a 4-wire configuration:
- Two hot conductors (red and black)
- One neutral conductor (white) – for current return
- One ground conductor (green or bare copper) – for safety path only
This separates the current-carrying function (neutral) from the safety function (ground). If the neutral breaks, the frame stays safely grounded and doesn’t become energized.
Can You Adapt a 3-Wire Outlet?
Technically, the NEC includes a “grandfather clause” that allows existing 3-wire installations to remain in service for existing appliances. So if your 1990-built Fort Worth home has a 3-wire range outlet, and you’re just replacing your old electric range with a new electric range, you can continue using that outlet.
But here’s where it gets complicated for induction cooktop installations:
⚠️ Three Critical Problems with 3-Wire Configurations
- Manufacturer Requirements: Most modern induction cooktop installation manuals from Bosch, Wolf, Samsung, and GE explicitly state “4-wire connection required” or similar language. Connecting to a 3-wire system violates the manufacturer’s installation instructions, which voids your warranty.
- Code Compliance on Modifications: If you modify the circuit in any way—extend it, move the junction box location, add additional wire length—you are legally required to bring the entire circuit up to current code, which means upgrading to 4-wire.
- Insurance Liability: In the event of an electrical fire or shock incident, your insurance company’s forensic investigator will examine whether the installation met manufacturer specifications. A 3-wire connection on an appliance requiring 4-wire can be grounds for claim denial.
How to Tell If You Have 3-Wire or 4-Wire
If your current cooktop plugs into an outlet (rather than being hardwired):
- 3-Wire Outlet: Three prongs in a triangular configuration
- 4-Wire Outlet: Four prongs (two at angles, one straight down, one straight up)
If your current cooktop is hardwired to a junction box, you’ll need to open the junction box to count the wires. If you’re not comfortable doing this, call a licensed electrician for inspection.
What to Do If You Have 3-Wire
The upgrade path is straightforward but not cheap:
- Abandon or remove the old 3-wire cable
- Pull new 4-wire cable from the electrical panel to the kitchen
- Install new breaker if needed (or verify existing breaker is appropriate size)
- Install proper junction box or outlet for new cooktop
- Permit and inspect the work
Cost in DFW: Typically $800-$1,500 depending on wire run difficulty
In Grapevine and Lewisville neighborhoods developed in the early-to-mid 1990s, we see a mix of 3-wire and 4-wire installations depending on exactly when during the year construction occurred. Homes completed before mid-1996 almost always have 3-wire range circuits. Homes from late 1996 onward are 4-wire.
The bottom line: if you’re investing in a premium induction cooktop, invest in the proper electrical infrastructure to support it safely and maintain your warranty coverage.
Why You Can’t Share Circuits Between Cooktops and Ovens (Even Though Code Allows It)
This is one of the most confusing aspects of cooktop circuit requirements, and it’s where well-meaning contractors sometimes give homeowners bad advice.
The NEC “Tap Rule” That Causes Confusion
The National Electrical Code, in Article 210.19(A)(3) Exception 1, includes what’s called a “tap rule” for cooking appliances. In simplified terms, it allows a single 50-amp branch circuit to supply both a cooktop and a wall oven by “tapping” smaller conductors (minimum 20-amp capacity) from the main circuit to each appliance.
On the surface, this seems like a money-saver. Instead of running two separate expensive 6-gauge copper circuits from your panel to the kitchen (one for the cooktop, one for the wall oven), you could theoretically run one 50-amp circuit and split it between both appliances.
Many contractors will suggest this approach to reduce installation costs, and they’ll cite the NEC tap rule as justification.
⚠️ The Critical Problem: Manufacturer Instructions Override NEC Tap Rules
There’s another section of the NEC that trumps the tap rule: NEC 110.3(B) requires that all electrical equipment be installed in accordance with its listing and labeling instructions.
What does your induction cooktop’s installation manual say?
- Bosch: “Dedicated circuit required”
- Wolf: “Must be supplied by a dedicated branch circuit”
- Samsung: “Requires dedicated circuit”
- GE Profile: “Connect to dedicated branch circuit only”
In the hierarchy of electrical code enforcement, specific manufacturer installation requirements override general permissive code provisions. Therefore:
Installing a modern induction cooktop on a shared circuit with a wall oven violates NEC 110.3(B), even if it technically complies with the tap rule in 210.19(A)(3).
Why Manufacturers Require Dedicated Circuits
This isn’t arbitrary. There are sound engineering reasons:
- Voltage Sag Under Combined Load: When both the oven and cooktop are operating at high power simultaneously (e.g., Thanksgiving dinner prep), the shared circuit experiences significant voltage drop. This can cause the induction cooktop’s sensitive electronics to malfunction or shut down.
- Inrush Current: The self-cleaning cycle on a wall oven draws enormous starting current. This momentary voltage sag can damage the power supply boards in the induction cooktop.
- Power Supply Board Warranty: The most expensive component in an induction cooktop is the inverter/power board. If this fails due to voltage instability from a shared circuit, the manufacturer will deny warranty coverage because you violated installation instructions.
What This Means for Your Installation Budget
If you’re doing a complete kitchen remodel with both a new wall oven and a new induction cooktop, you need to budget for two dedicated circuits:
- One 50-amp circuit for the induction cooktop (6 AWG copper)
- One 30-40 amp circuit for the wall oven (typically 8-10 AWG copper, depending on oven specs)
Don’t let a contractor talk you into the “one circuit for both” shortcut to save $400-$600. You’ll pay far more than that when your cooktop warranty is voided and you need a $900 power board replacement.
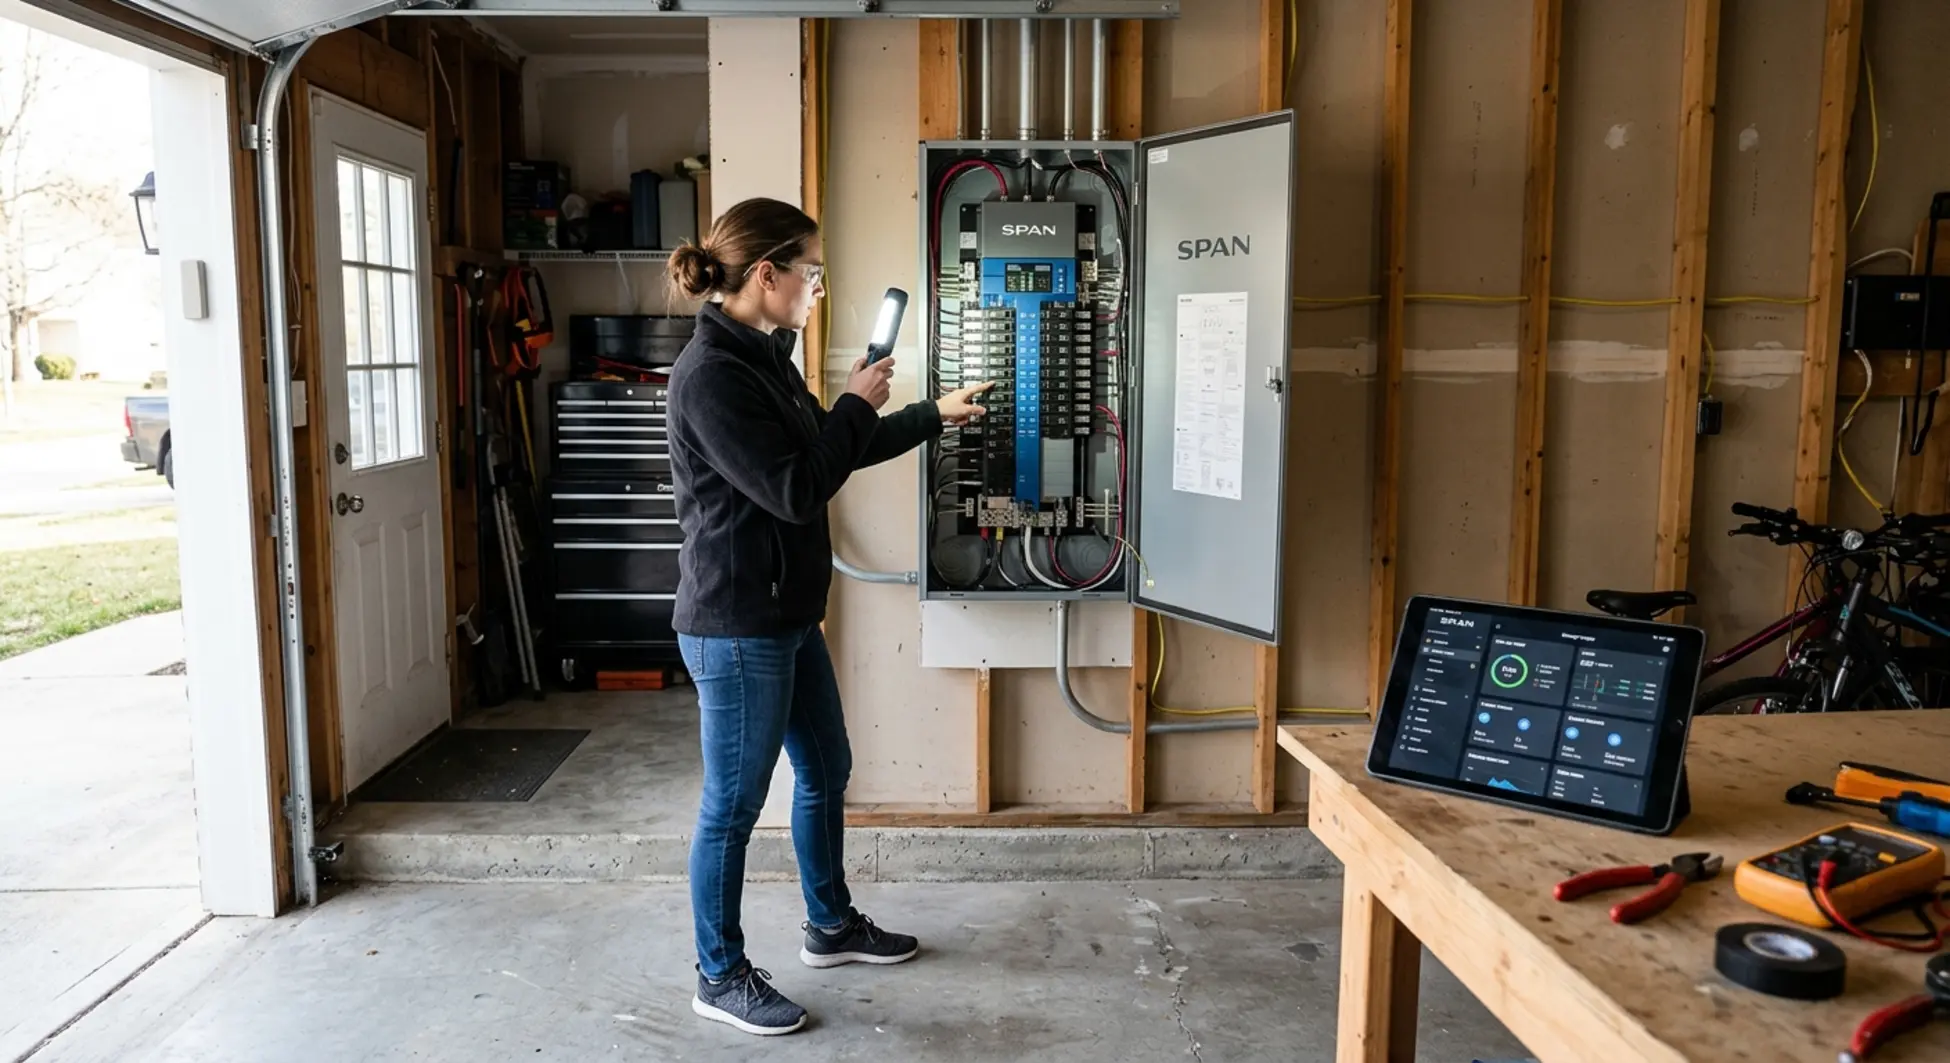
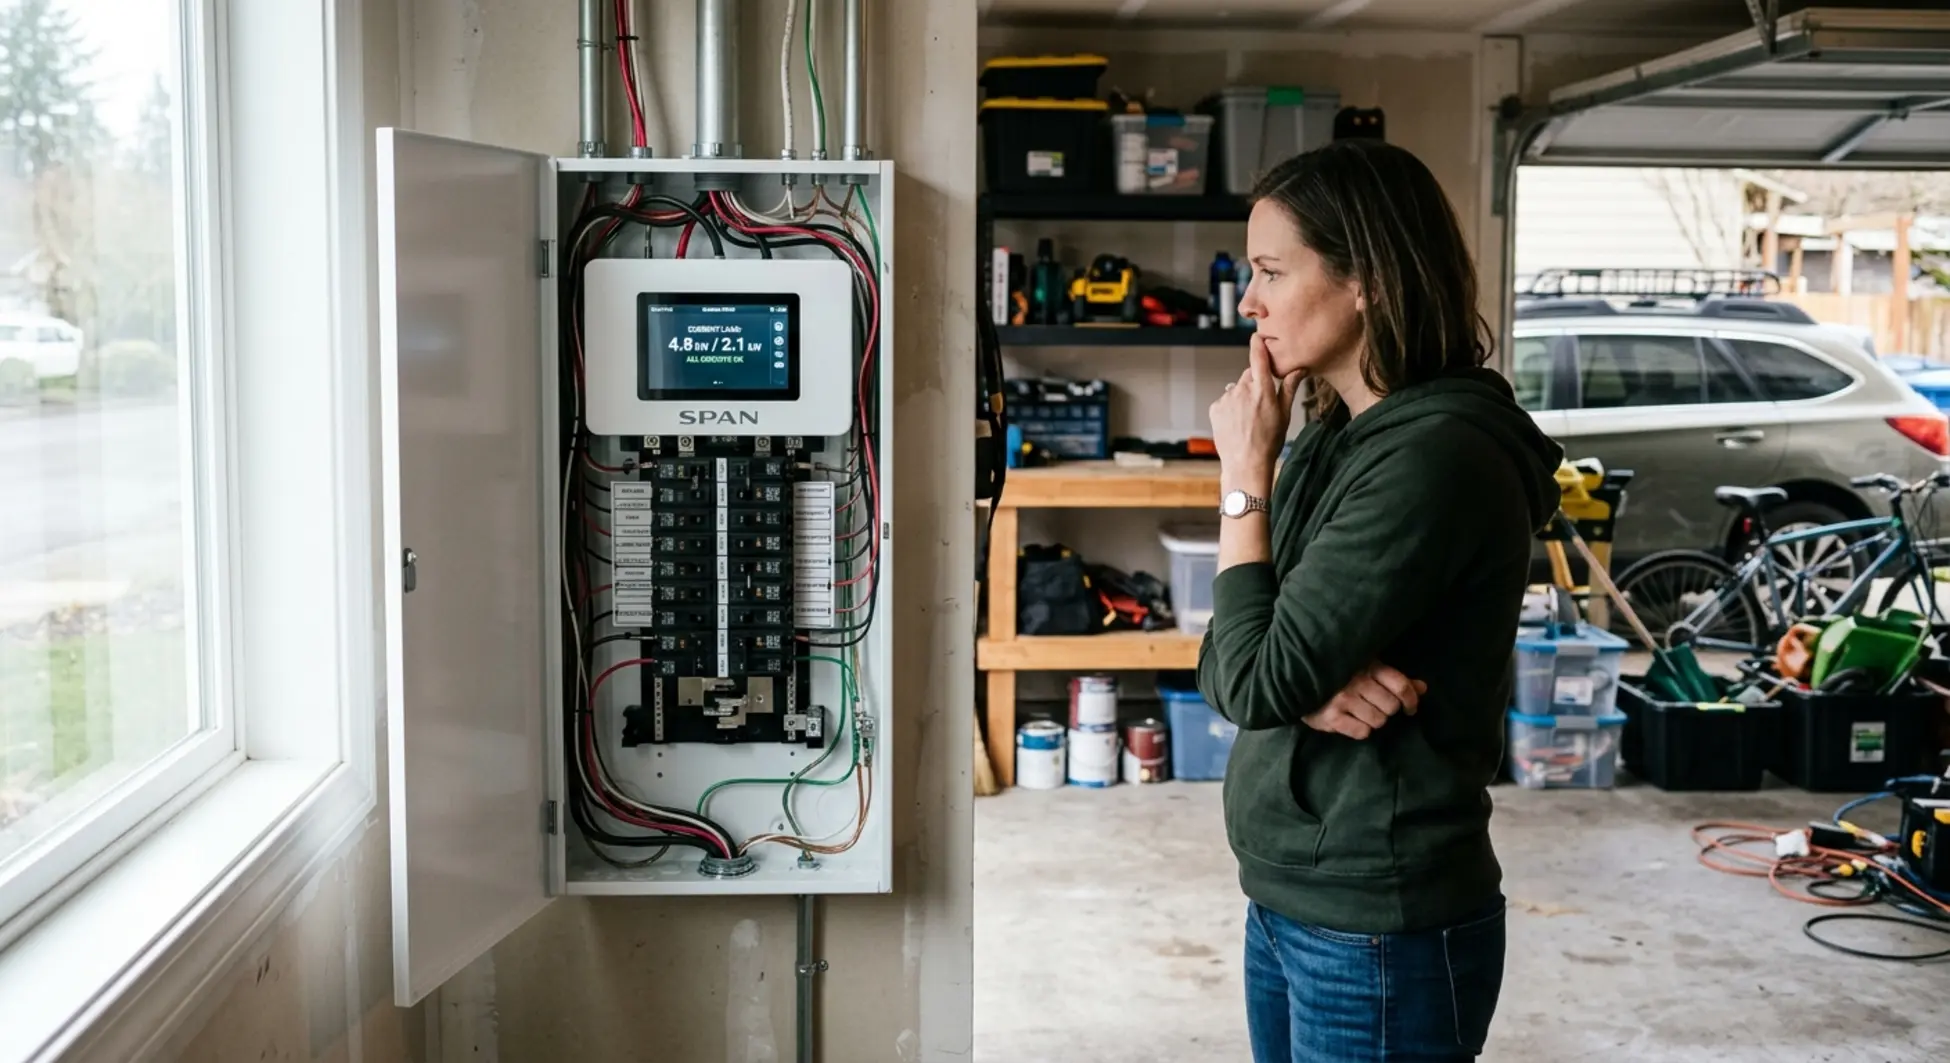
Does Your Electrical Panel Have Room for a 50-Amp Induction Cooktop?
Even if your wiring is copper, even if it’s 4-wire, even if it’s the right gauge—your electrical panel itself might be the limiting factor. This is especially common in DFW homes built before 1980.
Understanding Panel Capacity vs. Panel Space
Homeowners often confuse two different panel limitations:
- Physical Space: Whether there are empty slots available for additional breakers
- Amperage Capacity: Whether the panel’s total rated capacity can support the additional load
Having empty slots doesn’t mean you have capacity. And having capacity doesn’t mean you have slots. Let’s address both.
The Load Calculation Reality
Before adding any major appliance circuit, a licensed electrician must perform what’s called a “load calculation” per NEC Article 220. This is a standardized formula that sums up all the electrical demand in your home:
- General lighting load (calculated by square footage)
- Small appliance circuits (kitchen, dining, laundry)
- HVAC system (at 100% continuous load rating)
- Electric water heater
- Electric dryer
- Pool pump and heater
- Any other fixed appliances
The calculation applies “demand factors” (because not everything runs simultaneously) to determine your home’s actual peak demand load.
If adding an 11,000-watt (45-50 amp) induction cooktop pushes your calculated demand load above your panel’s rated capacity, you cannot legally install the cooktop without upgrading your electrical service.
Common Panel Sizes in DFW
Many Fort Worth homes built before 1980 have 100-amp main service panels. This was adequate for 1970s electrical loads but is often insufficient for modern all-electric kitchens.
When Panel Upgrades Become Necessary
Here’s the scenario we see weekly in Arlington and Fort Worth:
Homeowner has a 1975-built ranch with a 100-amp panel. The home has:
- Electric heat strips (60-80 amps when running)
- Electric water heater (20-30 amps)
- Electric dryer (30 amps)
- Central AC (20-30 amps)
- Standard lighting and outlet loads
The existing electric cooktop uses a 40-amp circuit. They want to upgrade to a 50-amp induction cooktop and add a 30-amp wall oven.
The load calculation shows the home’s peak demand would be approximately 115-125 amps under heavy use (cold winter night with heat running, cooking Thanksgiving dinner, dryer running). This exceeds the 100-amp service capacity.
Solution: Service upgrade to 200 amps.
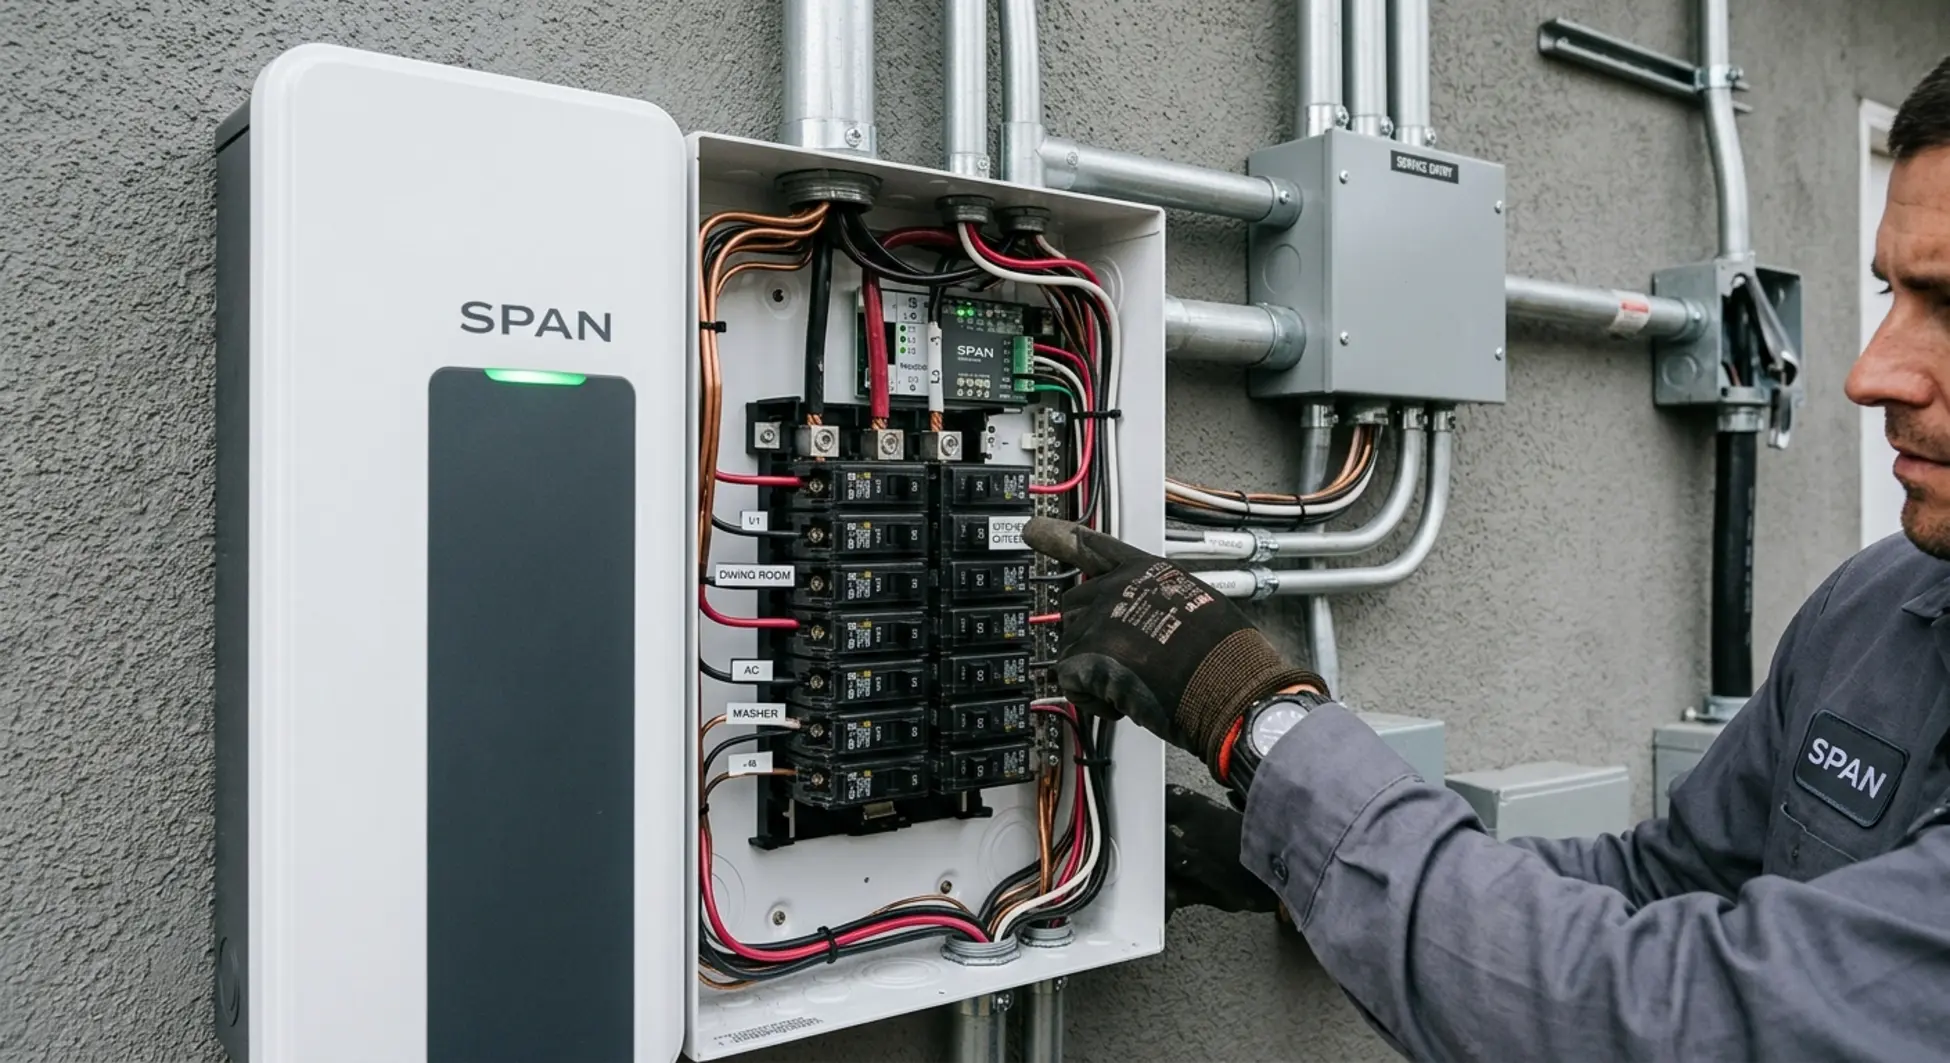
What a Service Upgrade Involves
A complete service upgrade in DFW typically includes:
- Coordination with Oncor or your local utility for meter disconnect
- Replacement of the meter base
- Replacement of the main service panel (from 100A to 200A)
- Upgrade of the grounding electrode system (ground rods, bonding)
- If overhead service: potentially upgrading the service drop and weatherhead
- If underground service: potentially upgrading the conduit from meter to panel
- Permit, inspection, and utility reconnection
| Service Upgrade Component | Cost Range (2025 DFW) |
|---|---|
| 200A Main Panel | $200-$400 |
| Meter Base Replacement | $150-$300 |
| Labor (8-12 hours) | $800-$1,800 |
| Permit & Inspection | $150-$250 |
| Utility Fees | $100-$300 |
| Grounding Upgrades | $200-$400 |
| Total Typical Cost | $2,500-$4,500 |
Variables that affect cost:
- Overhead vs underground service (underground is more expensive)
- Distance from meter to panel location
- Whether existing grounding system meets current code
- Accessibility of meter and panel locations
In Southlake and Colleyville, where many homes have underground service, we typically see panel upgrades toward the higher end of the cost range ($3,800-$4,500) due to the trenching and conduit work required.
The Subpanel Alternative
If your load calculation shows you have amperage capacity but your panel lacks physical breaker slots, there’s a much cheaper solution: install a subpanel.
A subpanel is essentially a smaller additional panel mounted adjacent to (or near) your main panel. It’s fed from the main panel with a large feeder cable and has its own set of breaker positions.
Typical cost in Fort Worth: $500-$900
This gives you 12-20 additional breaker positions without the massive expense and disruption of a full service upgrade.
💡 Get the Load Calculation BEFORE Buying the Cooktop
Don’t make the mistake of purchasing a $3,000 induction cooktop and then discovering you need a $4,000 panel upgrade to use it. Epic Electrical offers free electrical assessments for Fort Worth area homeowners planning kitchen upgrades. We’ll perform a load calculation, inspect your existing wiring, and give you a clear picture of what you’ll actually need to spend—before you buy the appliance.
The Voltage Drop Problem in Large DFW Homes
Here’s an issue that catches many electricians off guard, especially those who primarily work in smaller homes or multi-family buildings: Texas loves sprawling single-story ranch layouts.
In Southlake, Colleyville, and parts of Fort Worth, it’s not uncommon to find 3,500-4,500 square foot homes spread across a single level. The electrical panel might be in the garage on one end of the house, and the kitchen on the opposite end—a straight-line distance of 80-100+ feet.
What Is Voltage Drop and Why It Matters
Electrical wire has resistance. When current flows through a conductor, some voltage is “lost” (converted to heat) due to that resistance. The longer the wire run and the higher the current, the more voltage you lose.
For an induction cooktop drawing 45 amps at the end of a 100-foot wire run, voltage drop becomes significant:
- If you use 8 AWG copper wire over 100 feet carrying 45 amps, you’ll see approximately 9-10 volts of drop
- This means your cooktop receives only 230-231 volts instead of 240 volts
- While this is within the appliance’s tolerance range (most operate 208-240V), you’re at the edge of optimal performance
- If utility voltage is already slightly low (235V at the meter instead of 240V), your cooktop may start experiencing issues
The NEC Voltage Drop Recommendation
The National Electrical Code includes a recommendation (not a requirement) that voltage drop should not exceed 3% for branch circuits. For a 240-volt circuit, 3% is 7.2 volts, meaning you should maintain at least 232.8 volts at the appliance.
For long wire runs, the solution is to “up-size” the wire—use a larger gauge than the minimum required by the ampacity tables.
| Wire Run Distance | Standard Wire Size (50A) | Recommended for Long Runs |
|---|---|---|
| Under 75 feet | 6 AWG Copper | 6 AWG Copper |
| 75-100 feet | 6 AWG Copper | 4 AWG Copper |
| 100-150 feet | 6 AWG Copper | 3 or 2 AWG Copper |
Cost Impact
Up-sizing wire increases material costs:
- 6 AWG NM-B Copper: $4.50-$6.00 per foot
- 4 AWG NM-B Copper: $7.00-$9.00 per foot
For a 100-foot run, upgrading from 6 AWG to 4 AWG adds approximately $250-$300 in material cost alone.
Long Wire Runs in DFW
In Southlake and Colleyville luxury homes, approximately 30% of our induction cooktop installations require up-sizing to 4 AWG wire due to long distances from panel to kitchen.
We recently completed an installation in a 4,200 sq ft Colleyville home where the panel-to-kitchen run measured 115 feet. We used 3 AWG copper to ensure proper voltage delivery. The homeowner was initially surprised by the wire cost, but when we explained the alternative was a cooktop that wouldn’t perform to spec, they understood the value.
What Your Induction Cooktop Installation Will Actually Cost in Fort Worth
Let’s get down to real numbers. What follows are actual cost scenarios based on Epic Electrical’s 2025 pricing in the DFW market, reflecting current material costs, labor rates, and permit fees.
Scenario A: The Easy Swap (Rare but Real)
Starting Conditions:
- 2010-built home in Keller
- Existing 30-inch electric cooktop on 40-amp circuit
- 4-wire copper wiring in good condition
- New Bosch 30-inch induction cooktop requires 40 amps
- Panel has adequate capacity
Work Required:
- Verify new cooktop specifications
- Shut off circuit breaker
- Disconnect old cooktop from junction box
- Connect new induction cooktop (matching wire colors, proper torque)
- Verify proper operation
- No permit required (no circuit modification)
Time Required: 1-2 hours
Total Cost: $250-$450 (labor and trip charge only)
Scenario B: New Circuit Installation – Easy Access
Starting Conditions:
- 2005-built two-story home in Arlington
- Converting from gas cooktop to 36-inch Samsung induction
- Panel located in garage with attic access above kitchen
- Panel has capacity and available breaker slots
- Wire run approximately 45 feet
Work Required:
- Pull electrical permit with City of Arlington ($120-180)
- Install 50-amp GFCI breaker in panel (new 2023 NEC requirement)
- Run new 6/3 copper NM-B cable through attic
- Fish cable down wall cavity to junction box location
- Install properly sized junction box behind cooktop
- Make all connections with proper torque and labeling
- Schedule and pass electrical inspection
Time Required: 4-6 hours
| Item | Cost Range |
|---|---|
| Permit Fee (Arlington) | $120-$180 |
| 50A GFCI Breaker | $110-$160 |
| 6/3 Copper Wire (45 ft @ $5/ft) | $225 |
| Junction Box & Connectors | $40-$60 |
| Labor (4-6 hrs @ $100-120/hr) | $400-$720 |
| Total | $895-$1,345 |
Typical Actual Cost: $900-$1,200
Scenario C: New Circuit Installation – Difficult Access
Starting Conditions:
- 1995-built two-story home in Fort Worth
- Kitchen on first floor with living space above (no attic access)
- Slab foundation (no basement or crawlspace)
- Panel in garage, kitchen 65 feet away
Complication: No easy path for wire. Must either cut access holes in finished ceilings or run surface-mount conduit.
Work Required:
- Pull permit
- Install breaker
- Cut strategic access holes in garage ceiling and/or first floor ceiling
- Fish wire through cavities (much more time-intensive)
- OR run EMT conduit along exterior wall/garage ceiling (visible but code-compliant)
- Install junction box
- Patch and texture drywall
- Prime and paint patches to match
- Inspection
Time Required: 8-12 hours (electrical) + 4-6 hours (drywall)
Total Cost: $1,500-$2,500
In older Fort Worth neighborhoods south of I-30, we encounter this scenario frequently. Two-story homes from the 1980s-1990s with slab foundations present the most difficult wire-fishing challenges. We always discuss the drywall patch option versus visible conduit with homeowners before starting work.
Scenario D: Gas to Induction Conversion (Complete Kitchen Transformation)
Starting Conditions:
- 1980-built ranch in Grapevine
- Existing gas cooktop
- 120V outlet behind drawers for gas ignition
- No 240V circuit present
- Attic access available
Work Required:
Plumbing:
- Licensed plumber caps gas line at valve or inside wall
- If valve protrudes into space needed for new deeper cooktop, line may need to be cut back and capped inside wall cavity
- Pressure test to verify cap integrity
Electrical:
- Pull permit
- Install 50A GFCI breaker
- Run new 6/3 copper wire from panel to kitchen (50-60 ft typical)
- Install junction box
- Inspection
Carpentry (if needed):
- Patch any drywall opened for gas line work
- Repair/repaint
| Trade | Cost Range |
|---|---|
| Plumbing (gas line cap) | $150-$300 |
| Electrical (new 240V circuit) | $900-$1,500 |
| Drywall/Paint | $200-$400 |
| Total Project Cost | $1,250-$2,200 |
Timeline: 1-2 days (coordination between trades)
Gas-to-induction conversions are increasingly popular in Grapevine and Lewisville as homeowners prioritize indoor air quality. We coordinate with licensed plumbers we trust to ensure the entire project moves smoothly. Typical all-in cost: $1,800-$2,000.
Scenario E: The Aluminum Wiring Retrofit (Highest Complexity)
Starting Conditions:
- 1970-built ranch in Richardson
- Existing 30-inch electric coil cooktop
- Circuit inspection reveals aluminum branch wiring
- 3-wire configuration (pre-1996)
- Homeowner wants 36-inch Bosch induction cooktop
Problems to Solve:
- Aluminum wiring fire hazard
- 3-wire grounding inadequacy
- Existing circuit likely only 40 amps (need 50A for 36″ unit)
The Only Safe Solution: Complete circuit replacement
Work Required:
- Pull permit
- Install new 50A GFCI breaker in panel
- Abandon old aluminum wire in place (de-energize at panel, cap ends)
- Run entirely new 6/3 copper NM-B cable from panel to kitchen
- Install new 4-wire junction box
- Label old circuit as “abandoned” at panel
- Inspection
Benefits:
- Eliminates aluminum wiring fire risk completely
- Upgrades to modern 4-wire grounded configuration
- Provides full 50-amp capacity for any future cooktop
- Ensures code compliance and insurance coverage
- Peace of mind for decades
Time Required: 5-8 hours
Total Cost: $1,000-$2,000
✅ Real Epic Electrical Story
Last month, a homeowner in Arlington contacted us after another electrician quoted $4,500 for a “mandatory panel upgrade” before they could install their new Samsung induction cooktop. We came out for a second opinion.
The real problem? The existing circuit was 1968-era aluminum wiring. The first electrician saw the aluminum, immediately jumped to “you need a whole new panel,” and scared the homeowner.
Our diagnosis: The panel itself was fine—it had plenty of capacity. We only needed to replace that one aluminum circuit with new copper wiring. Total cost: $1,400. The homeowner saved $3,100, got a safer installation, and the cooktop works perfectly.
That’s the Epic Electrical difference: honest assessment, not automatic upselling.
Permits, Inspections, and the Insurance Trap
We need to have an uncomfortable conversation about permits. Many homeowners—and sadly, some contractors—view electrical permits as unnecessary bureaucracy that just adds cost and delays to projects.
This attitude has destroyed families financially. Let me explain how.
The Real-World Scenario (This Happens More Than You Think)
A Fort Worth homeowner hires a “handyman” they found on Craigslist to install a circuit for their new induction cooktop. The handyman quotes $400 (“way cheaper than a licensed electrician”). No permit is pulled. The work is completed over a weekend.
Three months later, during Thanksgiving dinner prep, an electrical fire starts inside the wall cavity near the junction box. The fire spreads rapidly through the wall and ceiling before the family can escape. Total damage: $180,000.
The insurance company sends a fire investigator. The investigator’s report notes:
- Fire originated at electrical junction box serving induction cooktop
- No permit on file with City of Fort Worth for this circuit
- Connections made with improper wire nuts (wrong size for wire gauge)
- Junction box overfilled beyond NEC capacity limits
- Installation did not meet manufacturer specifications
Claim denied. $180,000 out-of-pocket.
This isn’t a hypothetical scare tactic. This exact scenario—with minor variations—happens multiple times per year in DFW.
How Texas Insurance Policies Handle Unpermitted Work
Read your homeowner’s insurance policy carefully. Buried in the exclusions section, you’ll find language similar to:
In Texas, electrical work requires:
- A licensed electrician (Master or Journeyman under supervision)
- A permit for any new circuit installation or modification
- An inspection by the local building department
Skip any of these three requirements, and you’ve violated state law. Your insurance company can—and frequently does—deny claims related to that work.
The Real Estate Nightmare
Even if you never have a fire, unpermitted electrical work creates a landmine for future home sales.
The Texas Seller’s Disclosure Notice (Section 5.008 of the Property Code) legally requires sellers to disclose:
- Known material defects
- Modifications made to the home
- Whether proper permits were obtained
If you lie on this disclosure and the buyer discovers unpermitted work during their inspection (which most good inspectors will find), they can:
- Demand you bring it up to code before closing (expensive when you’re under contract deadline)
- Back out of the sale entirely
- Sue you for fraud under the Texas Deceptive Trade Practices Act (DTPA), which allows for treble damages (triple the actual damages)
⚠️ The “Five Years Later” Problem
We regularly get calls from homeowners trying to sell their house who discover their “handyman” installed the cooktop circuit five years ago without a permit. Now the buyer’s inspector has flagged it. The seller is 10 days from closing. They need the work permitted and inspected immediately.
Here’s the problem: You can’t just pull a permit for work that’s already completed and hidden in walls. The inspector needs to see the rough-in work (wiring before drywall is closed). This means:
- Open the walls
- Verify/correct the installation
- Inspection
- Patch and repaint drywall
Total cost to fix: $1,500-$2,500—and that’s if the work was done correctly and just needs to be exposed for inspection. If it was done wrong, add the cost to completely redo it.
All of this could have been avoided with a $150 permit.
Permit Costs in DFW (2025)
Let’s demystify what permits actually cost. These are not outrageous fees:
| City | Typical Electrical Permit Cost | Inspection Required |
|---|---|---|
| Fort Worth | $140-$200 | Yes |
| Dallas | $150-$250 | Yes |
| Arlington | $120-$180 | Yes |
| Keller | $100-$150 | Yes |
| Southlake | $125-$175 | Yes |
| Grapevine | $110-$160 | Yes |
For a $1,200 electrical installation, the permit represents 10-15% of the total cost. That’s a small price to pay for:
- Insurance coverage if something goes wrong
- Peace of mind about safety
- Clean title for home resale
- Compliance with manufacturer warranty terms
What to Ask Your Electrician
“Will you pull a permit for this work?”
If they say:
- “We don’t need a permit for this.” – Wrong. Any new circuit or circuit modification requires a permit in all DFW cities.
- “Permits are optional.” – Wrong. They’re required by law.
- “It’ll cost extra.” – The permit fee itself is fixed by the city. Labor to coordinate inspection should be included in a professional quote.
- “I can do it cheaper if we skip the permit.” – This is the reddest of red flags. Walk away immediately.
The correct answer is: “Yes, the permit is included in our quote. We’ll handle pulling it and coordinating the inspection.”
Why Cooktop Circuits Should Never Be DIY Projects
YouTube has democratized knowledge. You can watch a 15-minute video and learn the basic steps of installing an electrical circuit. For many home improvement projects, this DIY approach works fine.
Electrical work—especially high-amperage 240-volt circuits—is not one of those projects.
The Invisible Difference Between “Working” and “Safe”
Here’s what makes electrical work uniquely dangerous: an improperly installed circuit might work perfectly for months or even years before it fails catastrophically. Unlike a leaking pipe (you see water) or a poorly hung door (it doesn’t close right), electrical defects are invisible until they cause a fire.
What Homeowners Don’t Know (And YouTube Doesn’t Teach)
1. Torque Specifications (NEC 110.14(D))
Every electrical connection—whether it’s a wire termination at a breaker, a junction box connection, or a connection at the appliance—must be tightened to a specific torque value measured in inch-pounds.
For a 6 AWG copper wire terminated under a breaker lug, the proper torque is typically 35-45 inch-pounds (check your specific breaker manufacturer specs).
Too loose: High resistance connection generates heat, leads to arcing and fire
Too tight: Shears the copper strands, creating a weak point that will eventually fail and arc
Professional electricians use calibrated torque screwdrivers. These cost $150-$300. Most homeowners don’t own one. They tighten connections by “feel”—which is exactly how fires start.
2. Box Fill Calculations (NEC 314.16)
Every junction box has a maximum capacity for the number and size of wires it can contain. This is called “box fill” and it’s calculated based on wire gauge and the number of devices.
A standard 4x4x2-1/8″ metal junction box can hold:
- Nine 12 AWG wires, OR
- Eight 10 AWG wires, OR
- Seven 8 AWG wires, OR
- Five 6 AWG wires
For a cooktop junction box with 6 AWG wire (two hots, one neutral, one ground coming in, plus the appliance leads), you’re already at or near the limit of a standard box. Many DIYers don’t account for this and overstuff boxes.
Overstuffed boxes:
- Can’t dissipate heat properly
- Stress wire insulation when you force the cover on
- Violate code
- Fail inspection (if you even bother to get one)
3. Wire Insulation Damage During Installation
Fishing 6 AWG wire through wall cavities and attic spaces requires technique. The wire is stiff and heavy. If you pull too hard around a corner, you can damage the insulation. A small nick in the insulation might not cause immediate problems, but years later when the wire heats up during heavy cooktop use, that damaged section fails.
Professional electricians know how to:
- Use proper bend radius to prevent insulation damage
- Secure cable properly to prevent abrasion against framing
- Inspect for damage before making final connections
4. Grounding and Bonding Protocols
Proper grounding isn’t just connecting the green wire to the metal junction box with any screw. There are specific requirements:
- Ground screw must be green or marked “GR” or “GRD”
- Connection must be tight and free of paint or corrosion
- Box must be properly bonded to the grounding system
- Equipment grounding conductor must be sized appropriately (often same size as circuit conductors for ranges)
We’ve seen DIY installations where the “ground wire” was connected to a random screw, not an actual grounding point. In a fault condition, this provides zero protection.
Home Electrical Fire Statistics
According to the National Fire Protection Association (NFPA), 47% of home electrical fires involve equipment that was improperly installed or maintained. The majority of these cases involve work performed by unlicensed individuals.
The “It Worked for Six Months” Trap
We get calls from homeowners who installed their own cooktop circuit, used it successfully for months, then suddenly experienced a breaker trip or burning smell. They’re confused: “It worked fine until now. What changed?”
What changed is that the improperly torqued connection has been heating and cooling repeatedly. The metal has fatigued. The oxidation layer has built up. The resistance has increased to the point where it’s now generating enough heat to trip the breaker—or worse, ignite insulation.
The fact that it worked initially doesn’t mean it was installed correctly. It means you got lucky—until you didn’t.
⚠️ The Confidence Trap
“I’ve done electrical work before. I installed a ceiling fan once. I can handle this.”
Installing a 15-amp ceiling fan circuit and installing a 50-amp cooktop circuit are fundamentally different in complexity and stakes. The wire is three times thicker (harder to work with). The current is three times higher (less margin for error). The loads are continuous (sustained heat). And the consequences of failure are catastrophic.
Professional electricians spend years learning these nuances. A YouTube video can’t replace that expertise.
Frequently Asked Questions About Induction Cooktop Circuits
Can I plug an induction cooktop into a regular outlet?
Only portable/countertop induction cooktops designed for 120-volt operation can plug into standard outlets. Built-in induction cooktops (the kind installed permanently in your countertop) require dedicated 240-volt hardwired circuits. These are the same types of circuits used for electric dryers or electric water heaters—much more powerful than a standard wall outlet can provide.
Do all induction cooktops require 50-amp circuits?
No. The required circuit size depends on the cooktop’s wattage and physical size. Most 30-inch induction cooktops operate on 40-amp circuits with 8 AWG copper wire. Most 36-inch models require 50-amp circuits with 6 AWG copper wire. Always check your specific model’s installation manual for exact requirements. Installing a cooktop on an undersized circuit will cause nuisance breaker trips and void your warranty.
Can I use my existing electric range circuit for a new induction cooktop?
Maybe—but only if all four of these conditions are met: (1) The circuit was installed after 1996 and uses a 4-wire grounded configuration, (2) The wiring is copper (not aluminum), (3) The wire gauge and breaker are sized appropriately for your new cooktop’s amperage requirements, and (4) It’s a dedicated circuit not shared with any other appliance. If even one of these conditions isn’t met, you’ll need circuit upgrades.
How do I know if I have aluminum wiring in my DFW home?
Check your electrical panel or existing junction boxes for silver-colored conductors (copper is orange/brown). Look for cable jacket markings that say “AL,” “ALUMINUM,” or “KAISER ALUMINUM.” If your Fort Worth, Arlington, Richardson, or Plano home was built between 1965 and 1972, there’s a high probability you have aluminum branch circuit wiring. When in doubt, hire a licensed electrician to inspect.
Can an electrician safely connect my copper cooktop leads to aluminum house wiring?
Not safely for long-term high-amperage use. While there are specialized connection methods (AlumiConn lugs, Copalum crimps), these are compromise solutions. For a 50-amp induction cooktop circuit that will experience intense heat cycling, the only truly safe solution is complete circuit replacement with copper wire. At Epic Electrical, we won’t use wire nuts or temporary aluminum-to-copper adapters on cooktop circuits—the fire risk is too high.
Do I need a permit to install an induction cooktop in Fort Worth?
Yes. Any new electrical circuit or modification to an existing circuit requires a permit in Fort Worth, Dallas, Arlington, and all DFW municipalities. This isn’t optional. Permit costs typically range from $120-$200. Unpermitted electrical work can void your homeowner’s insurance, create liability during home sales, and violate your cooktop’s warranty terms. Always work with a licensed electrician who pulls proper permits.
Will my 100-amp electrical panel support an induction cooktop?
It depends on your home’s total electrical load. A licensed electrician must perform a load calculation per NEC Article 220 to determine if your panel has capacity. Many DFW homes built before 1980 with 100-amp panels cannot support a 50-amp induction cooktop addition without a service upgrade to 200 amps. This is especially common if you have electric heat, electric water heater, and electric dryer already installed. Service upgrades typically cost $2,500-$4,500 in the Fort Worth area.
How much does a panel upgrade cost in DFW?
In 2025, upgrading from a 100-amp to 200-amp electrical service in the Dallas-Fort Worth area typically costs $2,500-$4,500. Variables include whether your service is overhead or underground (underground costs more), the distance from your meter to your panel, whether your grounding system needs updates, and accessibility issues. Homes in Southlake and Colleyville with underground service tend toward the higher end of this range.
Can I share a circuit between my cooktop and wall oven?
No, even though NEC Article 210.19(A)(3) technically allows “tap rules” for cooking appliances. Here’s why: NEC 110.3(B) requires following manufacturer installation instructions, and virtually all major induction cooktop manufacturers (Bosch, Wolf, Samsung, GE) explicitly require dedicated circuits in their manuals. Shared circuits void your warranty and can cause power board failures due to voltage sags when both appliances run simultaneously. Always install separate dedicated circuits.
What’s the difference between a 3-wire and 4-wire cooktop connection?
A 3-wire configuration (common in homes built before 1996) combines the neutral and ground functions into a single conductor. This creates a shock hazard if the neutral wire breaks. A 4-wire configuration (required since 1996) separates the neutral (current-carrying return path) from the ground (safety path only). Modern induction cooktops require 4-wire connections for safety and warranty compliance. If your home has 3-wire range wiring, plan for a circuit upgrade.
Getting It Right the First Time in Fort Worth
We’ve covered a lot of ground in this guide—from aluminum wiring fire hazards to voltage drop calculations to insurance claim nightmares. If your head is spinning, that’s actually a good sign. It means you understand that installing an induction cooktop circuit isn’t as simple as “swap the old one for the new one.”
The complexity isn’t meant to scare you away from making the upgrade. Induction cooking is genuinely superior technology—faster, more precise, safer (no open flames or super-heated coils), and better for indoor air quality than gas or traditional electric. The technology is worth it.
But getting there safely requires understanding what your specific home needs.
The Pattern We See Every Week
Here’s what happens when homeowners don’t do their homework first:
- They buy a beautiful $2,500-$3,500 induction cooktop
- They schedule installation
- The installer opens the junction box and says “We have a problem”
- Suddenly they’re facing unexpected costs: panel upgrade, aluminum wiring replacement, 3-wire to 4-wire conversion
- They feel trapped—they’ve already bought the appliance and it’s sitting in their kitchen
There’s a better way.
The Epic Electrical Approach
We start every induction cooktop consultation the same way: we inspect your existing electrical infrastructure before you buy anything.
A 30-minute assessment tells us:
- What your current wiring composition is (copper or aluminum)
- What configuration you have (3-wire or 4-wire)
- What your panel capacity is (load calculation)
- What wire run challenges exist (distance, access)
- Exactly what you’ll need for code-compliant installation
Then we give you honest options at different price points:
💡 Real Example: Three Options for One Homeowner
Last week, a Keller homeowner wanted to upgrade to a 36-inch Samsung induction cooktop. After inspection, we presented three options:
Option 1 – Budget Approach ($1,200): Install a 30-inch Bosch model instead. Their existing 40A circuit could handle it with just a junction box swap. No new wiring needed.
Option 2 – Mid-Range ($1,800): Keep the 36-inch Samsung, run new 50A circuit, requires opening one section of drywall for wire run.
Option 3 – Premium ($2,600): Install the 36-inch Samsung plus upgrade aluminum wiring we found on another kitchen circuit while we’re doing the work, future-proofing the entire kitchen.
They chose Option 3. Why? Because we explained the aluminum wiring risk, showed them the cost to fix it now versus fixing it during a future emergency, and let them make an informed decision. No pressure, just facts.
Sometimes the good news is your current setup works fine with minimal modifications. Sometimes we find aluminum wiring that absolutely must be replaced for safety. Either way, you’ll know exactly what your home needs—not what generates the biggest invoice for us.
That’s the Epic Electrical difference, and that’s why Fort Worth homeowners trust us with their families’ safety.
✅ Before You Buy That Induction Cooktop:
- Check your home’s age (1965-1972 = aluminum wiring concern)
- Look at your electrical panel size (100A, 125A, or 200A?)
- Count the wires at your current cooktop connection (3 or 4?)
- Get your new cooktop’s installation manual (check amperage requirements)
- Call Epic Electrical for a free electrical assessment
Call or Text: (682) 478-6088
Serving Fort Worth, Arlington, Keller, Southlake, Colleyville, Grapevine, Lewisville, and all of DFW
Before you buy that induction cooktop, let us make sure your home is ready. A 30-minute assessment today can save you thousands in surprises tomorrow—and keep your family safe for decades to come.