Circuit Breaker Testing Methods: Multimeter Procedures & Safety Guidelines for DIY
Key Takeaways
- Circuit breakers protect your home — They’re automatic safety switches that cut power before wiring overheats and causes fires.
- A digital multimeter is your primary tool — You only need voltage (V) and continuity (Ω) modes for basic circuit breaker testing.
- Safety comes before everything — Wear insulated gloves and safety glasses, use a non-contact voltage tester first, and never work near a wet or visibly damaged panel.
- Testing is informational — repair is not DIY — You can safely test a breaker to understand what’s happening, but replacement requires a licensed electrician.
- DFW homes face unique challenges — Texas heat accelerates breaker aging, and many older DFW homes have panels with known safety issues (Federal Pacific, Zinsco).
- Frequent tripping usually isn’t a bad breaker — Overloaded circuits and short circuits are more common culprits than a faulty breaker mechanism.
- Know when to stop and call a pro — Burning smells, scorch marks, hot breakers, or water damage near the panel are non-negotiable stop signs.
It’s 2 AM. You’re half-awake, standing in a dark hallway, and the same circuit breaker has tripped for the third time this week. The house is quiet except for the hum of the AC working overtime — because it’s Texas, and it’s summer, and it’s never not hot. You’re staring at the panel wondering: Is this something I can figure out myself, or do I need to call someone?
That’s a completely reasonable question. And the honest answer is: it depends. Some of this you absolutely can handle yourself — specifically, testing the breaker to understand what’s going on. Other parts, like replacing the breaker or rewiring a circuit, require a licensed electrician. Knowing the difference isn’t just about saving money. It’s about keeping your family safe.
This guide walks you through circuit breaker testing methods using a multimeter — step by step, in plain English. We’ll cover what tools you need, how to use them safely, what your results mean, and exactly when to put the multimeter down and pick up the phone. If you’re dealing with electrical issues in your home, understanding your circuit breakers is one of the most useful things you can do as a homeowner.
Let’s get into it.
Why Circuit Breaker Testing Matters for Your Home
Most homeowners don’t think about their electrical panel until something goes wrong. That’s understandable — when everything works, there’s no reason to go poking around in a metal box full of wires. But circuit breakers are one of those things where a little knowledge goes a long way, both for safety and for your wallet.
What a Circuit Breaker Actually Does
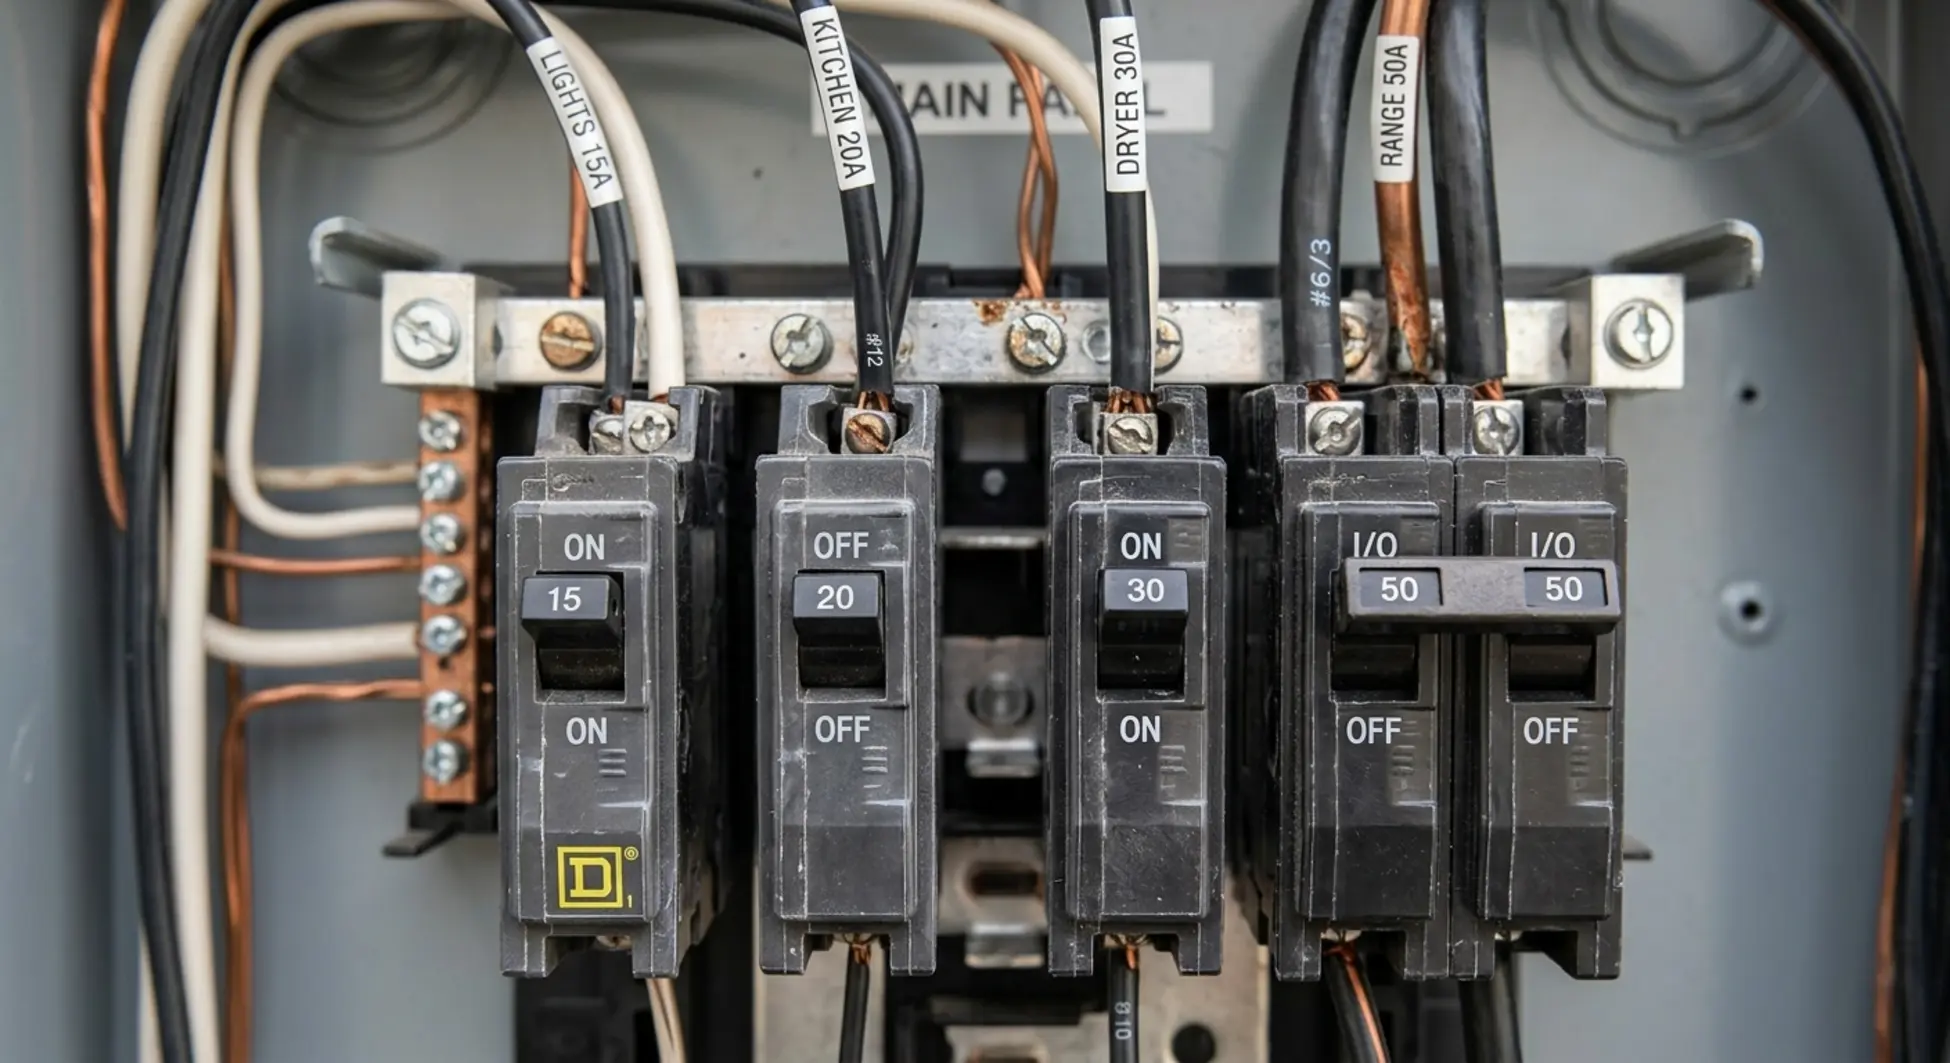
A circuit breaker is an automatic safety switch. When the electrical current flowing through a circuit exceeds a safe level — whether because of too many devices running at once, a short circuit, or a failing appliance — the breaker trips and cuts power to that circuit. This prevents the wiring from overheating, which is one of the leading causes of residential electrical fires.
Unlike fuses, which are one-and-done (they blow and have to be replaced), circuit breakers can be reset. That’s a feature, not a flaw. But it also means a tripping breaker can be reset and ignored, which is exactly the wrong approach when the tripping is a symptom of something more serious.
Your panel is essentially the nervous system of your home’s electrical setup. Every circuit in your house — your kitchen outlets, your bedroom lights, your HVAC system — runs through a dedicated breaker. When one of those breakers starts acting up, it’s telling you something. The question is what.
Common Signs Your Breaker Needs Testing
Not every breaker problem announces itself dramatically. Sometimes the signs are subtle. Here’s what to watch for:
- Repeated tripping on the same circuit — If the same breaker keeps tripping, especially under normal load conditions, it’s worth investigating.
- Breaker won’t stay in the ON position — If it flips back to OFF immediately after you reset it, there’s likely a fault in the circuit or the breaker itself is failing.
- Burning smell near the electrical panel — This is a red flag that demands immediate attention. Don’t test. Call a pro.
- Outlets or lights losing power intermittently — Flickering or intermittent power loss on a circuit can indicate a breaker that’s struggling to maintain a solid connection.
DFW homeowners deal with electrical demands that many other parts of the country don’t. When it’s 105°F outside and your AC is running constantly, your electrical system is under sustained stress. That kind of load, day after day through a Texas summer, accelerates wear on breakers — especially in homes that are 20 or 30 years old. If your breaker issues tend to spike in summer, that’s not a coincidence.
Safety First: Essential Precautions Before Testing
Before we get into the how-to, let’s talk about the non-negotiables. Electrical work — even something as straightforward as testing a breaker — involves real risk if you skip the safety steps. This isn’t meant to scare you off. It’s meant to make sure you come out the other side fine.
PPE and Tools You’ll Need
You don’t need a contractor’s tool belt to test a circuit breaker safely. But you do need the right basic equipment:
- Insulated gloves — Rated for your home’s voltage (120/240V). Standard rubber gloves from a hardware store work for basic testing.
- Safety glasses — Electrical panels can produce sparks. Protecting your eyes costs nothing and takes two seconds.
- Digital multimeter — Your primary testing tool. More on this in the next section.
- Non-contact voltage tester — A backup safety device that tells you whether a surface is energized without making physical contact.
- Flashlight — Electrical panels are often in garages, utility closets, or hallways with poor lighting. You need to see clearly.
The Golden Rule: When NOT to Test Yourself
There are situations where the right move is to close the panel and call a licensed electrician. No exceptions, no second-guessing:
- The panel is wet or shows any sign of water damage or moisture
- You see burn marks, melted plastic, or discoloration on or around the breakers
- You’re not confident you can identify the specific breaker you need to test
- The breaker is hot to the touch — not warm, hot
- You feel uncertain or uncomfortable at any point during the process
⚠️ Your Safety Matters More Than Saving a Service Call
Electrical panels contain live current even when individual breakers are in the OFF position. The main lugs — the large wires feeding power into the panel from the utility — are always energized unless the utility company disconnects your service. If you feel uncertain at any point, stop and call a licensed electrician. There’s no shame in that. It’s genuinely the smart move.
Understanding Your Multimeter: The Right Tool for the Job
A digital multimeter looks more complicated than it is. If you’ve never used one, the dial with a dozen different symbols can feel overwhelming. But here’s the truth: for circuit breaker testing, you’re only going to use two or three settings. Everything else on the dial you can ignore for now.
Multimeter Modes You’ll Actually Use
Let’s demystify the dial:
- Voltage (V~) mode — The tilde (~) indicates AC voltage, which is what your home uses. This mode measures electrical potential — essentially, whether power is present and how much. This is your primary testing mode for circuit breakers.
- Continuity (Ω) mode — Some meters have a dedicated continuity setting (often indicated by a sound wave or diode symbol). This checks whether current can flow through a circuit path. For breaker testing, you’ll use this to check whether the breaker mechanism itself is functioning.
- Amperage (A) mode — Less critical for breaker testing specifically, but useful if you want to check how much current a circuit is actually drawing. You won’t need this for basic diagnosis.
How to Select the Right Meter for Your Needs
You don’t need to spend a lot of money here. A reliable beginner multimeter runs $20–$50 and will handle everything you need for home electrical testing. Here’s what to look for:
- Auto-ranging — The meter automatically adjusts its sensitivity based on what it detects. This is much easier than manually selecting a range, especially if you’re new to electrical testing.
- Voltage rating — Make sure it’s rated for at least 300V AC. DFW homes run on 120/240V, so any standard meter will cover you.
- Backlit display — Helpful when you’re working inside a dim panel. Small feature, big difference in practice.
- CAT rating — Look for CAT II or CAT III rating. This indicates the meter is designed for household electrical testing and can handle transient voltage spikes safely.
Brands like Fluke, Klein Tools, and AstroAI all make solid entry-level meters in this price range. You don’t need a $200 professional-grade meter for what we’re doing here.
💡 Pro Tip: The Non-Contact Voltage Tester Is Your Safety Net
Before you touch anything inside the panel with your multimeter probes, run a non-contact voltage tester over the area first. This device detects the presence of electrical current without making physical contact — you just hold it near the wire or terminal and it beeps or lights up if voltage is present. It’s a $10–$20 investment that adds a critical safety check to your process. Every electrician uses one. You should too.
If you’ve gathered your tools and you’re feeling uncertain about what you’re seeing inside your panel, that’s a completely valid reason to get a professional set of eyes on it. A free estimate means you get answers without any commitment.
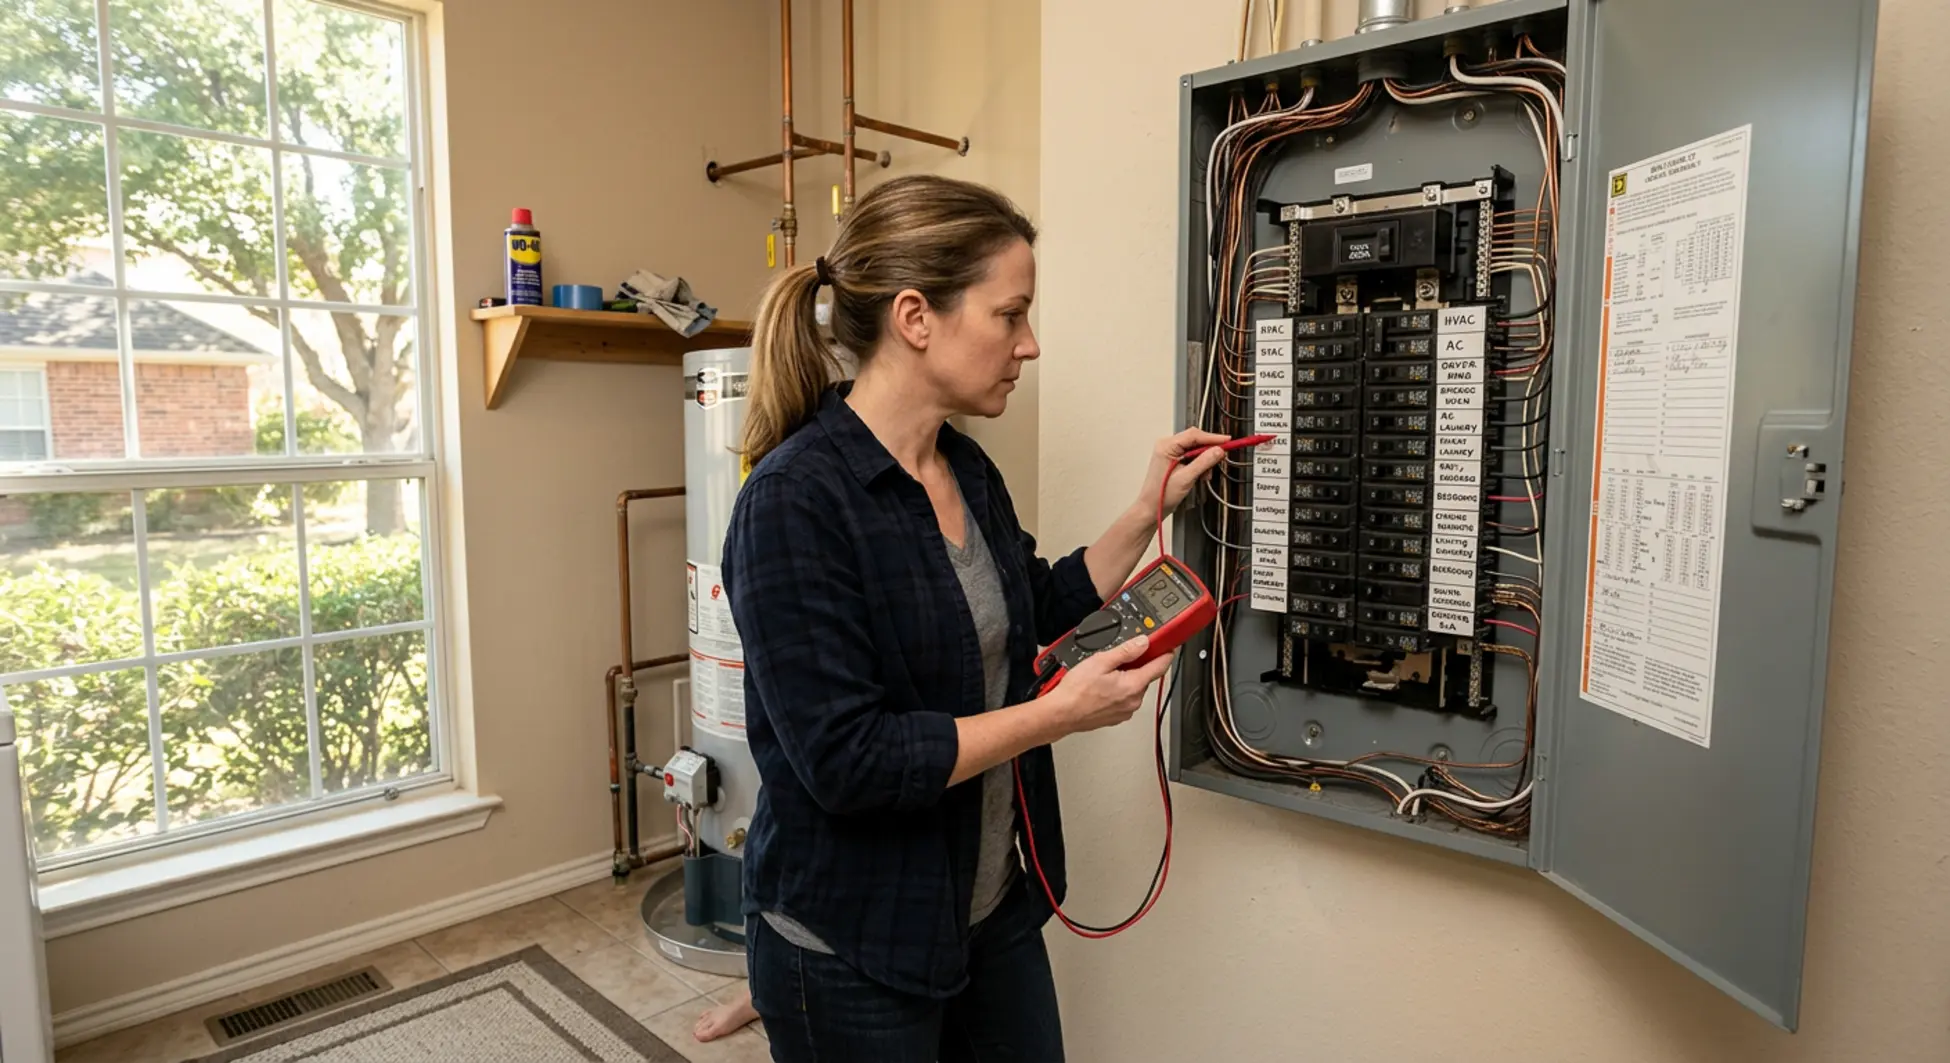
Step-by-Step: Testing a Circuit Breaker with a Multimeter
Alright — here’s the practical part. We’re going to walk through the actual circuit breaker testing procedures in a way that’s clear, safe, and actionable. Read through the entire process before you start. Understanding the full picture before you open the panel is part of doing this right.
Pre-Test Checklist
Preparation isn’t just a formality — it’s about 80% of safe electrical testing. Before you open the panel:
- Turn off all lights and unplug all devices on the circuit you’re planning to test. This reduces the load and eliminates variables.
- Confirm the breaker you want to test is in the ON position. If it’s already tripped to the middle position, you can reset it to ON before testing.
- Put on your insulated gloves and safety glasses before opening the panel cover.
- Have someone else in the house who knows where the main breaker is. If something goes wrong, they can cut power immediately.
- Use your non-contact voltage tester to sweep the area around the breaker before touching anything with your multimeter probes.
Testing Voltage at the Breaker
This test tells you whether power is actually reaching the breaker from the main panel. Here’s how to do it:
- Set your multimeter to AC voltage (V~) mode. If your meter isn’t auto-ranging, select the 250V range.
- Insert the red probe into the red (positive) port on your multimeter, and the black probe into the black (negative/COM) port.
- Carefully touch the red probe to the breaker’s terminal screw — this is the screw where the circuit wire connects to the breaker.
- Touch the black probe to the neutral bar — the silver bar running along the side of the panel where white wires connect.
- Read the display. You should see approximately 120V for a single-pole breaker (standard outlets, lights) or 240V for a double-pole breaker (dryer, range, HVAC).
- If you read 0V, the breaker isn’t receiving power from the main panel. Note this — it indicates an upstream issue.
Keep your movements deliberate and controlled. Don’t let the probes slip or touch adjacent terminals. Work slowly.
Testing Continuity (The Breaker Mechanism)
This test checks whether the breaker’s internal mechanism is functioning — whether it can actually pass current from input to output when it’s in the ON position.
- Turn OFF the breaker you’re testing. This is important — you’re testing the mechanism, not the live circuit.
- Switch your multimeter to continuity mode (often indicated by a diode symbol or sound wave icon). Many meters will beep when continuity is detected.
- Touch one probe to the breaker’s input terminal (where the hot wire from the panel feeds in) and the other probe to the output terminal (where the circuit wire connects).
- A good breaker will show continuity — the meter beeps, or the display reads near 0Ω (ohms).
- No continuity or high resistance suggests the breaker’s internal mechanism has failed. The breaker is likely faulty and needs replacement.
What Your Results Mean
Here’s how to interpret the combination of your voltage and continuity readings:
- Voltage present + good continuity — The breaker is likely functioning normally. The problem may be elsewhere in the circuit (overload, failing appliance, wiring issue).
- Voltage present + no continuity — The breaker may be tripped internally or is faulty. Try resetting it fully (OFF then ON) and retest. If it still shows no continuity, the breaker is likely bad.
- No voltage + good continuity — Power isn’t reaching the breaker from the main panel. This points to an upstream issue — a loose connection, a problem with the main breaker, or a utility-side issue.
- No voltage + no continuity — The breaker is getting no power and isn’t passing current. This is a more complex situation that warrants professional diagnosis.
- Burning smell or visible damage at any point — Stop immediately. Close the panel and call a licensed electrician.
🔍 Why Your Breaker Keeps Tripping (Even If It Tests Fine)
A breaker that tests perfectly fine electrically might still trip repeatedly — and that’s not a contradiction. The breaker is doing its job by responding to a problem in the circuit. An overloaded circuit, a short circuit in the wiring, or a failing appliance can all cause repeated tripping even when the breaker mechanism itself is healthy. Testing the breaker is an important first step, but it’s only part of the diagnosis. The root cause often lives elsewhere in the circuit.
Diagnosing Common Circuit Breaker Problems
Testing gives you data. But data only helps if you know what to do with it. This section connects your test results to the real-world problems they indicate — so you can make an informed decision about what comes next.
Understanding the electrical problems in your home starts with knowing which category your issue falls into. Most circuit breaker problems fall into one of three buckets: overloaded circuits, short circuits, or aging equipment. Let’s break each one down.
Overloaded Circuits: The Most Common Culprit
An overloaded circuit is exactly what it sounds like — too many devices drawing too much power from a single circuit at the same time. This is by far the most common reason a breaker trips, and it’s also the most straightforward to address.
In DFW homes, the usual suspects are space heaters, window AC units, hair dryers, and electric kettles — high-draw appliances that pull 1,200 to 1,500 watts or more. When you’re running two of these on the same 15-amp circuit, you’re asking for a trip. The breaker isn’t broken. It’s working exactly as designed.
The fix is simple in concept: redistribute the load. Move high-draw devices to different circuits. If your kitchen has only one or two circuits and you’re regularly tripping breakers while cooking, the long-term solution might be adding a dedicated circuit — which requires a licensed electrician, but it’s a relatively straightforward job.
Testing the breaker in an overload situation will typically show normal voltage and good continuity. The breaker is fine. The circuit is just being asked to do more than it was designed for.
Short Circuits: When Wires Touch
A short circuit is more serious. It happens when a hot wire makes contact with a neutral wire or a ground — either through damaged insulation, a loose connection, or a failing device. The result is a sudden, massive surge of current that the breaker responds to immediately by tripping.
The telltale sign of a short circuit is that the breaker trips immediately or within seconds of being reset. You might also notice a popping sound, a burning smell, or a visible flash when the device causing the short is plugged in or turned on.
Short circuits are a fire hazard. They’re not something to reset and ignore. If your breaker is tripping immediately after reset, especially if it’s accompanied by any of those warning signs, that circuit needs to be taken out of service until a professional can identify and repair the fault. Don’t keep resetting a breaker that trips instantly — you’re bypassing the protection it’s designed to provide.
Aging Breakers in DFW Homes
Circuit breakers don’t last forever. Most are rated for 30–40 years under normal conditions, but Texas heat is not normal conditions. Attic temperatures in DFW can exceed 140°F in summer, and if your electrical panel is in or adjacent to an unconditioned attic space, that heat is working against the breaker’s components year-round.
Breakers older than 20–25 years may start failing more frequently — not because they’re overloaded or responding to a short, but because the internal mechanism has simply worn out. An aging breaker might trip under loads it previously handled without issue, or it might fail to trip when it should (which is actually more dangerous).
If your home is 25 or more years old and you’re experiencing repeated breaker issues, age is a legitimate factor to consider. Modern breakers also include improved arc-fault circuit interrupter (AFCI) and ground-fault circuit interrupter (GFCI) protection that older breakers lack — protection that can prevent fires and electrocution in ways that older technology simply couldn’t.
When to Call a Professional Electrician
Let’s be straight with you: testing a circuit breaker is something a careful, safety-conscious homeowner can do. Replacing one is not. And there are situations where even testing should be left to a professional. Knowing the difference is what separates smart DIY from dangerous DIY.
Red Flags That Demand Professional Help
If you encounter any of the following, close the panel, step back, and call a licensed electrician:
- Burning smell or visible scorch marks on the breaker, the panel interior, or the wiring
- A breaker that’s hot to the touch — warm is concerning; hot is a stop-everything situation
- Multiple breakers tripping simultaneously — this often indicates a main panel issue or a serious fault
- Water damage or corrosion anywhere in or around the electrical panel
- A breaker that won’t reset or that resets only to trip again within seconds
- Buzzing, crackling, or hissing sounds from the panel — these are never normal
Why DIY Breaker Replacement Isn’t an Option
We get it — if the breaker is clearly bad, why not just swap it out yourself? Here’s why that’s not a good idea, even if you’re handy:
First, the electrical panel contains live current even with the main breaker switched OFF. The service entrance wires — the large cables that bring power from the utility into your panel — are always energized. They cannot be de-energized without the utility company disconnecting your service. Working near those wires without proper training and equipment is genuinely dangerous.
Second, improper breaker installation creates fire and shock hazards that may not be immediately obvious. A breaker that isn’t properly seated, or that’s the wrong type for your panel, might appear to work fine while creating a dangerous condition inside the panel.
Third, building codes in Texas require that breaker replacement be performed by a licensed electrician. If you do the work yourself and something goes wrong — a fire, an injury, an insurance claim — your DIY electrical work could void your homeowner’s insurance coverage or create liability issues when you sell the home.
What to Expect During a Professional Inspection
If you’ve done your testing and found something concerning, or if you’ve decided you’d rather have a professional handle the diagnosis from the start, here’s what a professional inspection typically looks like:
A licensed electrician will test the breaker and the related circuits, identify the root cause of the tripping or failure, and give you a clear explanation of what they found and what your options are. You should expect transparent pricing — a breakdown of what the repair involves and what it costs — before any work begins. If you want a free estimate from a licensed electrician, that’s exactly the kind of conversation we have every day. No pressure, no upsell — just a straight answer about what’s happening and what it would take to fix it.
✅ You’re Smart to Know Your Limits
Testing a breaker to understand what’s happening is smart homeownership. It means you’re paying attention, you’re not ignoring warning signs, and you’re gathering information before making decisions. Knowing when to hand it off to a licensed professional is even smarter. That’s not failure — that’s wisdom. The homeowners who get into trouble are the ones who keep resetting a tripping breaker and hoping it resolves itself.
If your testing revealed something concerning — or if you’d rather have a licensed electrician walk through the diagnosis with you — a free estimate is a no-pressure way to get a straight answer about what’s happening in your panel.
Circuit Breaker Testing in Older DFW Homes
If your home was built before 1990, there are some additional considerations that go beyond the standard testing procedures. Older homes in the DFW area often have electrical systems that were installed under different codes, with different equipment, and without the safety features that are standard today. That doesn’t mean your home is dangerous — but it does mean you need to be more informed.
Problematic Breaker Brands in Older Homes
Two panel brands have well-documented safety issues that every DFW homeowner with an older home should know about:
Federal Pacific Electric (FPE) / Stab-Lok panels were installed in millions of American homes from the 1950s through the 1980s. These breakers have been found to fail to trip during overloads at a significantly higher rate than other brands — meaning they may not protect your home when they’re supposed to. If your panel has “Stab-Lok” breakers or a Federal Pacific label, replacement is strongly recommended, not just as a precaution but as a genuine safety measure.
Zinsco panels (also sold under the GTE-Sylvania brand) have similar issues — the breakers are prone to corrosion and can fuse to the bus bar, making them impossible to trip even when a fault occurs. Again, if you have a Zinsco panel, replacement is the recommended course of action.
Neither of these brands is still manufactured. If your home has one of them, testing individual breakers is less useful than getting the entire panel evaluated by a licensed electrician.
Signs Your Older Panel Needs Upgrading
Beyond brand-specific issues, here are signs that an older panel has reached the end of its useful life:
- Frequent breaker tripping despite testing showing no electrical fault in the breaker itself
- Visible corrosion, rust, or discoloration on the panel interior or breakers
- Breakers that are difficult or stiff to reset — they should move smoothly
- You want to add a new circuit (EV charger, hot tub, home office) but there’s no space in the panel
- The panel is undersized for your current electrical load (common in homes that have been renovated or expanded)
How Texas Heat Affects Breaker Lifespan
This is worth spending a moment on because it’s genuinely DFW-specific. Electrical components have rated operating temperature ranges. When those ranges are consistently exceeded, the components degrade faster.
In DFW, attic temperatures routinely exceed 140°F during summer months. If your electrical panel is located in or adjacent to an unconditioned attic space — which is common in many DFW homes built before 2000 — it’s experiencing that heat stress for months at a time, every year. The insulation on wires becomes brittle faster. The lubricants inside breaker mechanisms dry out. The metal components expand and contract repeatedly, loosening connections over time. This is why a 20-year-old panel in Phoenix or Dallas often looks worse than a 30-year-old panel in Seattle.
Proper panel location matters. If your panel is in a garage or utility room that gets extremely hot, and you’re experiencing unexplained electrical issues, the environment may be a contributing factor worth discussing with a professional.
Preventive Maintenance: Keeping Your Breakers Healthy
The best electrical problem is the one you catch before it becomes an emergency. A little bit of regular attention to your electrical panel can save you from a 2 AM trip to the breaker box — or worse, an electrical fire. Here’s how to build simple maintenance habits that actually work.
Monthly Breaker Inspection Routine
You don’t need to open the panel or use any tools for a basic monthly inspection. This is a visual and sensory check that takes about five minutes:
- Open the panel cover and visually scan the interior for any signs of corrosion, moisture, insect activity, or discoloration
- Confirm all breakers are in the ON position (unless you’ve intentionally turned one off)
- Take a sniff — a burning smell near the panel is never normal and warrants immediate investigation
- Carefully (with the back of your hand, not your palm) check whether any breakers feel warm or hot to the touch
- Listen for any buzzing, crackling, or humming sounds from inside the panel
If everything looks, smells, and sounds normal, close the panel and you’re done. If anything seems off, note it and investigate further — or call a professional.
Load Management Best Practices
Most circuit overloads are preventable with a little awareness of how your home’s electrical load is distributed:
- Avoid running multiple high-draw appliances simultaneously on the same circuit. Space heaters, hair dryers, and microwaves are the usual culprits.
- Use power strips with surge protection for electronics, but don’t daisy-chain power strips together — that’s a fire hazard.
- Spread heavy loads across different circuits when possible. If your kitchen has two circuits, balance the load between them.
- Consider dedicated circuits for high-draw devices that run frequently — a dedicated circuit for your home office, your EV charger, or your chest freezer eliminates competition for circuit capacity.
Labeling and Documentation
This one sounds boring, but it’s genuinely useful — especially in an emergency or when you’re explaining a problem to an electrician:
- Label each breaker in your panel with the circuit it controls. Most panels have a label card inside the door — fill it out completely.
- Create a simple diagram of your panel and keep it with your home records or take a photo of it on your phone.
- Note which circuits are dedicated to high-draw devices (HVAC, dryer, range, water heater).
- If you ever have a breaker trip, note the date, what was running at the time, and what you observed. This information is valuable for diagnosis.
💡 The $5 Habit That Prevents $500 Problems
Spend 10 minutes every few months doing a visual inspection of your panel. You’re not doing electrical work — you’re just looking and listening. Catching a sign of corrosion, an unusual smell, or a warm breaker early means you can address it on your schedule, not in the middle of a crisis. That’s the best return on investment in home maintenance, and it costs nothing but a few minutes of your time.
Tools and Resources for Ongoing Electrical Safety
Having the right tools on hand and knowing where to turn for reliable information makes you a more capable, more confident homeowner. You don’t need a workshop full of equipment — just a few key items and a relationship with people you can trust.
Building a relationship with a trusted local electrician in DFW is one of the most practical things you can do for your home’s long-term electrical health. Not because you’ll need them constantly, but because when something does come up — and it will — you want to already know who to call and trust that you’ll get a straight answer.
Essential Tools to Keep on Hand
You don’t need to build a full electrical toolkit. A few targeted items cover most of what a homeowner needs for basic electrical awareness:
- Digital multimeter ($20–$50) — The Klein MM300 and AstroAI AM33D are both solid entry-level options. Auto-ranging, CAT III rated, backlit display. Everything you need.
- Non-contact voltage tester ($10–$20) — The Fluke LVD2 or Klein NCVT-1 are reliable and easy to use. This is your safety check before any electrical work.
- Insulated screwdrivers — If you ever need to access the panel, having properly insulated screwdrivers (rated 1000V) is basic safety equipment.
- Flashlight with good battery life — A headlamp is even better, since it keeps your hands free when you’re working inside a panel.
Learning Resources for Homeowners
Electrical knowledge is publicly available and worth pursuing. A few reliable sources:
- National Electrical Code (NEC) — The NEC is the standard for electrical installation in the US. You don’t need to read the whole thing, but understanding the basics of circuit sizing and panel requirements is useful.
- City of Dallas and Fort Worth building departments — Both cities have online resources explaining local electrical code requirements and permit processes. If you’re doing any work that requires a permit, start here.
- YouTube tutorials — There’s genuinely good educational content on electrical safety and testing. Stick to channels run by licensed electricians or established trade organizations. Verify anything you learn against a second source.
- Your electrician — Seriously. A good electrician is a resource, not just a service provider. Ask questions. A professional who gives you straight answers and explains what they’re doing is worth their weight in gold.
Your Circuit Breaker Testing Checklist
Here’s a quick-reference checklist you can bookmark or print out. Use it every time you test a circuit breaker so you don’t skip steps when you’re tired, stressed, or working in a hurry.
Before You Start
- ☐ Gather tools: multimeter, non-contact voltage tester, insulated gloves, safety glasses, flashlight
- ☐ Turn off devices: unplug everything on the circuit you’re testing
- ☐ Confirm breaker position: breaker should be in the ON position before voltage testing
- ☐ Brief someone: make sure another person in the home knows where the main breaker is
- ☐ Safety sweep: use non-contact voltage tester before touching anything inside the panel
- ☐ Stop conditions check: no burning smell, no visible damage, no moisture — if any present, stop and call a pro
During Testing
- ☐ Set multimeter to AC voltage (V~) mode
- ☐ Test voltage: red probe to breaker terminal, black probe to neutral bar — expect ~120V or 240V
- ☐ Record voltage reading on paper or your phone
- ☐ Switch to continuity mode and turn breaker OFF
- ☐ Test continuity: probes to input and output terminals — good breaker beeps or reads near 0Ω
- ☐ Record continuity result
- ☐ Stop immediately if you see burning, smell smoke, or feel unsafe at any point
After Testing
- ☐ Document your findings: voltage reading, continuity result, any unusual observations
- ☐ Note any anomalies: heat, smell, discoloration, difficulty resetting
- ☐ Interpret results: use the guide above to understand what your readings mean
- ☐ Make a decision: is this a load management issue (DIY), or does it need a professional?
- ☐ If uncertain: contact a licensed electrician with your documented findings — they’ll know exactly what to look at
Frequently Asked Questions About Circuit Breaker Testing
Can I test a circuit breaker while it’s still in the panel?
Yes — testing voltage and continuity with the breaker installed in the panel is standard procedure and is exactly what this guide covers. However, it’s important to understand that the panel contains live current at all times, including from the service entrance wires that cannot be de-energized without utility company involvement. Use your non-contact voltage tester before touching anything, wear your PPE, and work deliberately. If you’re uncomfortable working near the panel at any point, that discomfort is useful information — call a professional. Safety always comes first, and there’s no test result worth a shock.
What does it mean if my multimeter shows 0 volts at the breaker?
A reading of 0 volts at the breaker terminal means the breaker isn’t receiving power from the main panel — not that the breaker itself is bad. This could indicate a tripped main breaker, a loose or failed connection between the main panel and the individual breaker, or an upstream issue with the utility service. It’s also possible your multimeter probes weren’t making solid contact, so double-check your probe placement before drawing conclusions. A 0-volt reading is a situation where professional diagnosis is important, because the issue is upstream of the individual breaker and requires tracing the circuit back toward the source.
How often should I test my circuit breakers?
You don’t need to actively test your circuit breakers on a regular schedule unless you’re experiencing problems. Breakers are passive devices — they sit there and do their job without needing periodic testing to stay functional. What you should do regularly is a visual inspection of your panel: check for corrosion, unusual smells, discoloration, or breakers that feel warm to the touch. Do this every few months and after any significant electrical event (storm, power surge, appliance failure). If a specific breaker starts tripping repeatedly or behaving abnormally, that’s when testing becomes relevant and useful.
Is it safe to replace a circuit breaker myself?
No — breaker replacement is not a DIY task, and this isn’t just a liability disclaimer. The electrical panel contains live current at the service entrance even with the main breaker switched off, and working near those wires without proper training and equipment creates a genuine risk of electrocution. Beyond the safety issue, Texas building codes require that breaker replacement be performed by a licensed electrician, and improper installation can create fire hazards that aren’t immediately visible. If your testing has identified a faulty breaker, document your findings and call a licensed electrician — the replacement itself is typically a straightforward job for a professional.
Why does my breaker keep tripping even though it tests fine?
A breaker that tests fine electrically is doing exactly what it’s supposed to do — responding to a problem in the circuit. The most common causes of repeated tripping with a healthy breaker are an overloaded circuit (too many high-draw devices on one circuit), a short circuit in the wiring or a connected device, or a failing appliance that’s drawing more current than it should. Testing the breaker tells you the breaker mechanism is functional; it doesn’t tell you why the circuit is causing it to trip. If redistributing your electrical load doesn’t resolve the tripping, a professional can trace the circuit and identify the actual fault.
What’s the difference between a breaker that’s tripped and one that’s faulty?
A tripped breaker has responded to an overcurrent condition and moved to the OFF (or middle) position — it’s doing its job. You can reset it to ON by first moving it fully to OFF, then back to ON. If the circuit condition that caused the trip has been resolved (device unplugged, load reduced), the breaker should stay on. A faulty breaker, by contrast, won’t stay in the ON position regardless of the circuit load, trips repeatedly under normal conditions, or shows no continuity when tested in the OFF position. Faulty breakers need replacement by a licensed electrician — resetting them repeatedly doesn’t fix the underlying problem and can mask a more serious issue.
Found Something in Your Panel You’re Not Sure About?
You’ve done the right thing by testing and gathering information. Whether your multimeter turned up something concerning, or you’d simply rather have a licensed electrician handle the diagnosis from the start, we’re here to give you a straight answer — no pressure, no upsell. We’re a family business, and we treat your home the way we’d treat our own. Get a free estimate and find out exactly what’s happening with your electrical system.
Serving Fort Worth, Arlington, Keller, Southlake, Colleyville, Grapevine, Lewisville, and all of DFW | (682) 478-6088